Setup Page
This is where you will generally start a project by designing the signal-flow graph that you will be working with. The Setup page is also where you manage the loading and saving of projects to disk.
Setup Modules
The Environment Setup editor is a modular environment. The signal flow starts from the inputs at the top of the graph and concludes with the outputs at the bottom. You add modules to rows using the small + icon to the left of the window.
The graph editor
The modular graph editor handles basic mouse editing.
Module selection
Modules can be selected by clicking on them. To select several ones, hold Ctrl/Cmd while clicking on additional modules. It is also possible to use a marquee selection by left-clicking, holding the button, and dragging the mouse over the modules you want to select.
Drag & Drop
The drag-and-drop feature allows an easy and ergonomic way to connect and reorganize modules on the setup page.
Connect modules
To create a connection between two modules, simply drag one on the other. SPAT will automatically connect the two modules. If it is necessary, SPAT will also create supplementary modules if needed. For example, if we drag and drop an input on a room, SPAT will automatically create a “source” block between them.
This feature also works on a selection of multiple modules of the same type. For example, if we wished to connect 5 inputs to 1 output, we can select our inputs a drag them on the output. All the input modules will be patched to a room block through sources, and the room is a patch to the output through a master block, with the default stereo room that can be changed later.
Reorganize modules
The drag-and-drop feature also allows reorganizing the modules of the same type. This means that you can now change the order of already created modules. This gives to the setup page a more ergonomic and flexible feel.
Important to note that this will be changing the index number of the source. So be careful with automation already created. This is specific to OSC like using the plugins with OSC where the index is important. Not the case with software sources/inputs that use a different ID system.
The setup wizard
In our effort to make SPAT Revolution easier to use, we created a small utility to help you set up new SPAT sessions. This is used mainly when dealing with hardware I/O.
To open it, you can either:
- Click on the
Setup Wizardbutton in the top menu of the Setup page; - Go to the main menu, into setup, then “Setup Wizard”;
- Or, use
ALT + W(the shortcut is not working in Windows).
The top part of the setup wizard allows to create a new room (with associated options) or to select an existing room to patch new sources into. If a new room is created, we can choose its stream type and many options linked to it. We can also choose to associate a binaural monitoring block to it (virtualizing the room output). Lastly, for each new room created, a master block and an output block is also created.
The main part of the wizard allows the creation of different types of sources. It works like a table where each line can be used for a specific input stream type. To add or remove a line, simply click on the + or - sign on the left side of a line. You can also use the shortcut Ctrl/Cmd + Go Down or Ctrl/Cmd + Go Up.
Other shortcuts have been implemented in this wizard:
Go upandGo downto increase / decrease the number of sourcesGo LeftorGo Rightto change the Stream Type.Ctrl/Cmd + Go LeftorCtrl/Cmd + Go Rightto change the format (if Channel Based), or the Dimension (if HOA).Ctrl/Cmd + Shift + Go LeftorCtrl/Cmd + Shift + Go Rightto change the Order (if HOA).
When we are done creating the different sources, we have two ways to validate the operation. We can either click on Ok, and all the sources, rooms and outputs will be created, with a straight routing, or, we can choose to click on Ok + matrix. This last option will open the input and output matrix of our whole SPAT Revolution session to allow us to quickly customize or validate our patch. Also, if you need to easily create a line in SPAT matrix, simply hold Ctrl and click on the starting point of your line.
Action menu
This menu handles the basic operation of modules, like connecting, disconnecting and renaming. Some of these actions are contextual, and depend on the block, or the number of modules selected.
Note that there is no undo in SPAT Revolution. Think twice before operating and save regularly.
Remove selected
Remove the selected modules.
Duplicated selected
Duplicate the selected modules.
Room duplication
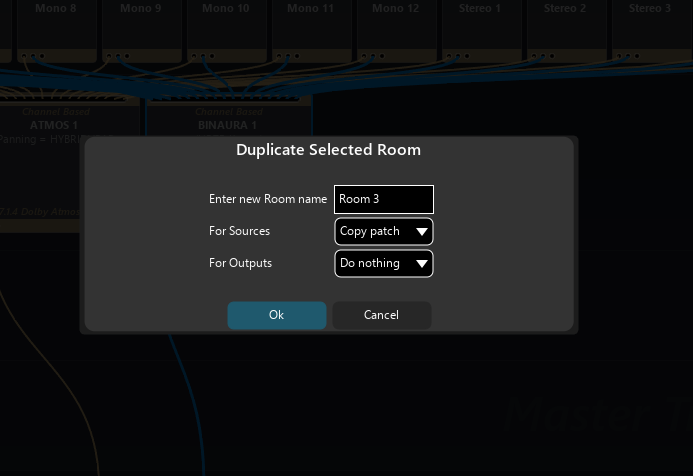
SPAT Revolution allows quickly duplicating a room with a few options to help the user to optimize the routing process. To access this menu, simply click on the Duplicate Selected button, when only a room is selected.
The new pop-up window allows to:
- Rename the duplicated room
- Choose if the sources routed to the original room are routed to the new one, or duplicated, or nothing is patched.
- Choose if the outputs of the original rooms are duplicated, mirrored or nothing is done to the duplicated room.
Connect selected
Connect selected modules. Modules can be connected to multiple destinations.
SPAT Revolution will always try to guess what you try to achieve. For example, you can connect an input block directly to an output block and SPAT will create the necessary modules in-between.
Disconnect selected
Disconnect both inputs and outputs of the selected modules.
Disconnect selected inputs
Disconnect connected inputs of selected modules.
Disconnect selected output
Disconnect connected outputs of selected modules.
Disconnect between selected
Disconnect the connections between selected modules.
Record arm
Arm the block for recording.
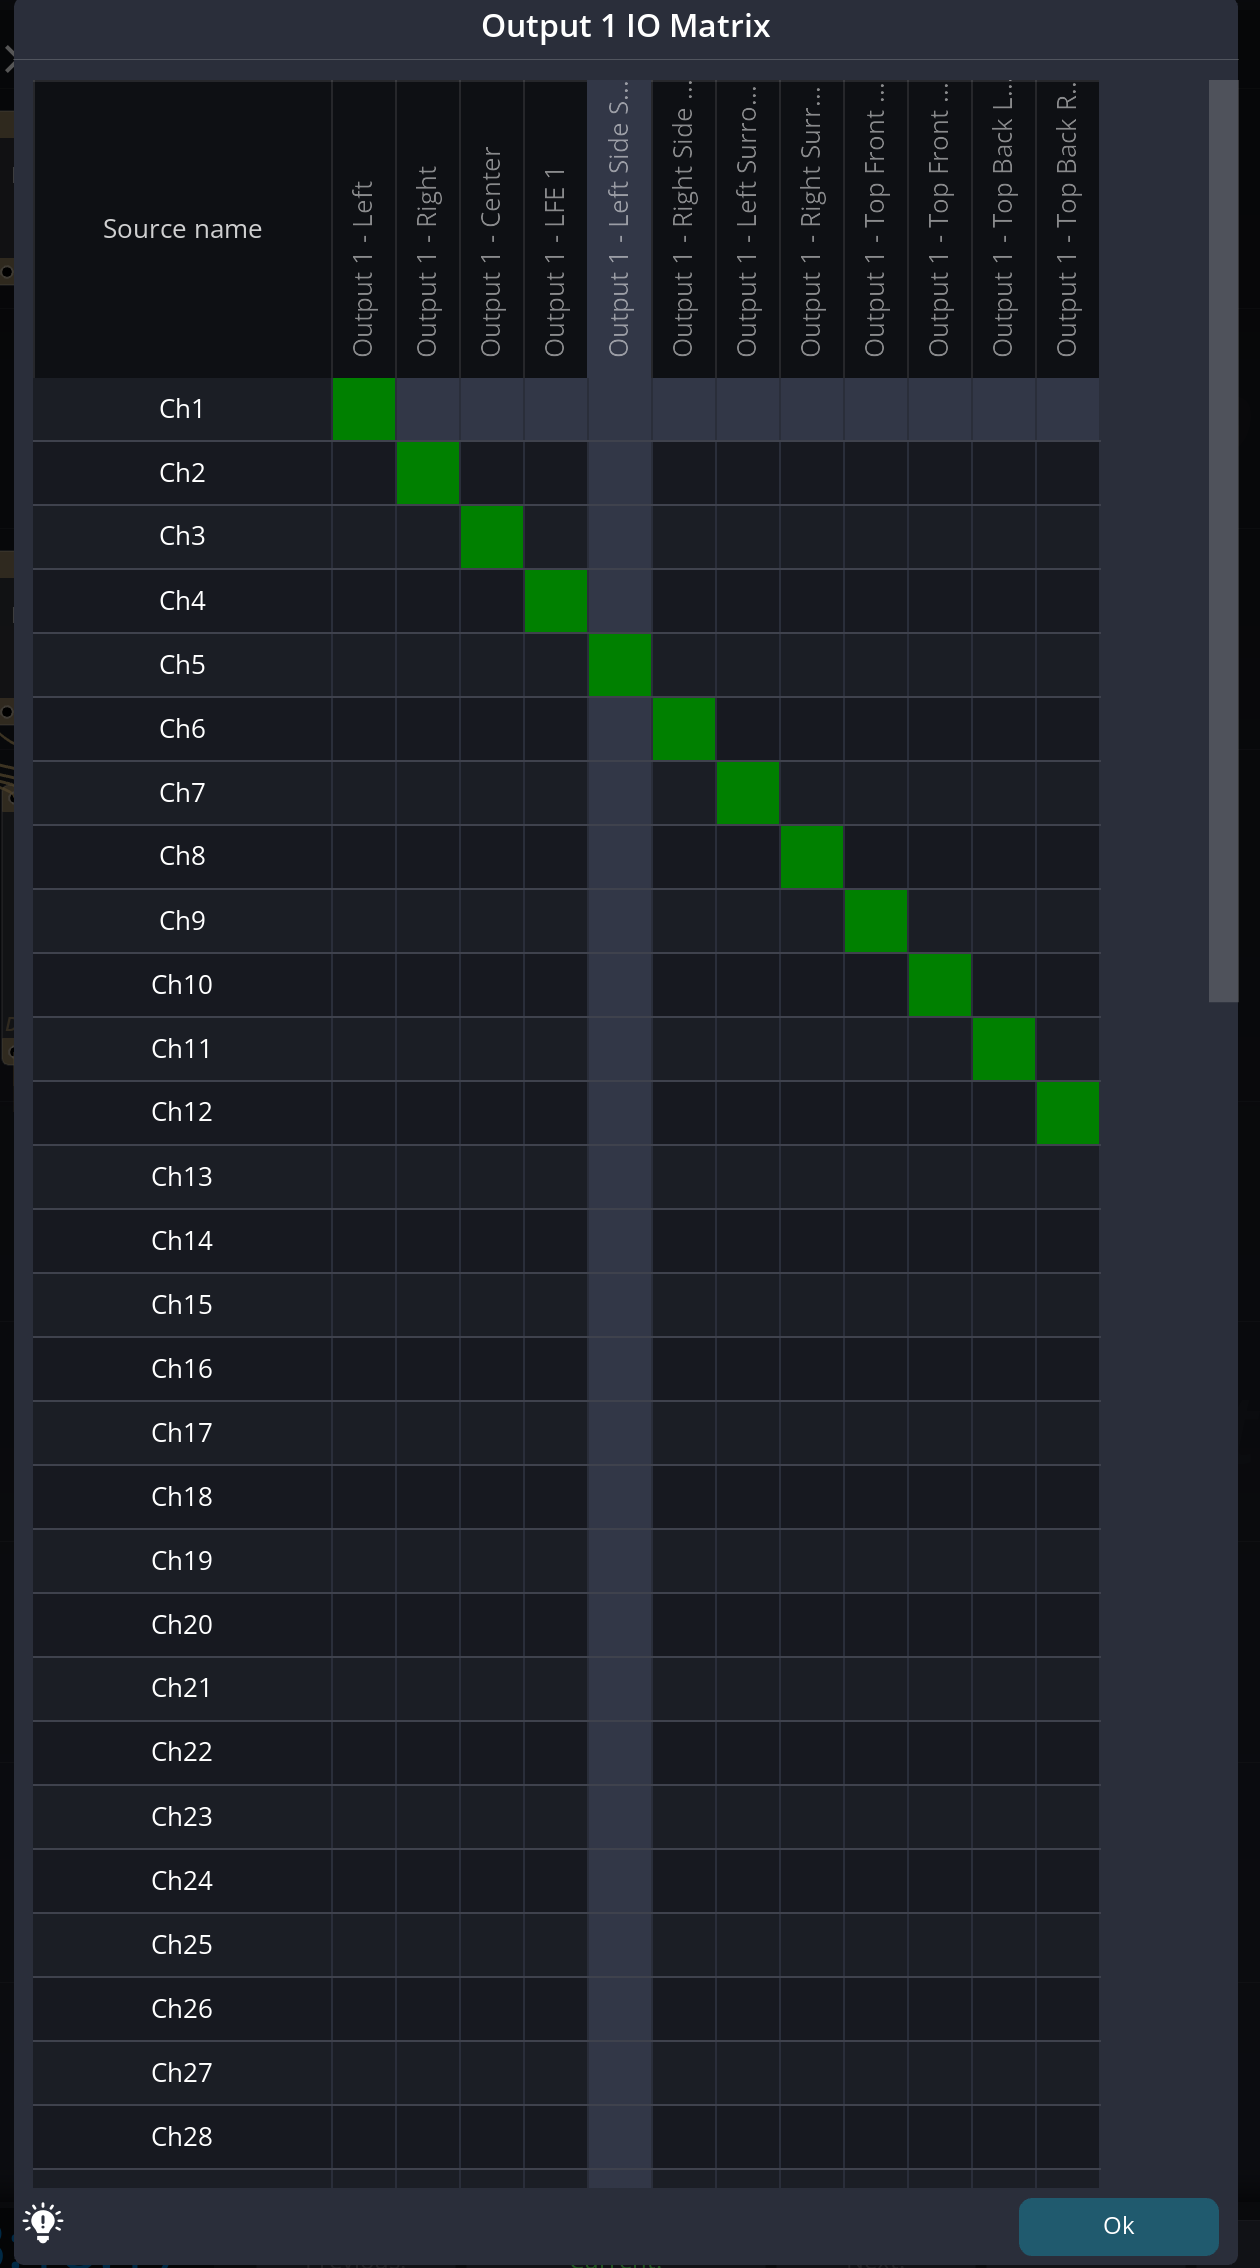
Routing Matrix
As you can imagine routing and patching high-density channel counts can get complicated. When it comes to that, the SPAT routing matrix is there to help. You will find it at many points throughout the Environment Setup graph.
Avoid cable swapping on the loudspeaker setup, use software routing instead.
The routing matrix is available on hardware input and output for routing as well as for remapping within some module’s input and output: Input transcoder, Master, and Master transcoder.
The speaker configuration editor, a clear channel labeling and the built-in routing matrix system all help to make the process of signal routing, checking and debugging more straightforward on location, in the virtual mix and the studio.
The shortcut Ctrl + click will route one per one all the following channels.
Master transcoder and master matrix support summing, thus, one input can be connected to several outputs, or the opposite.
Auxiliary Outputs
Any output module can be flagged as an auxiliary output. When an output is set as auxiliary, it is removed from the standard spatial rendering chain and instead becomes a send destination for all sources via their auxiliary send levels (see Auxiliary Send Auxiliary Send).
To create an auxiliary output:
- Add an output module in the Setup page.
- Select the output and enable the Auxiliary toggle in the output inspector.
- Rename the output for easy identification (e.g., “Reverb”, “Delay”, “Monitor”).
Auxiliary outputs are CPU-efficient because they bypass the spatial rendering engine. Use them for effects sends, monitoring, or any workflow that does not require spatialization.
Delay Compensation
The Setup page provides a Delay Compensation toggle that, when enabled, automatically aligns all sources connected to a room by inserting compensating delays.
This is especially important when using auxiliary buses: the send/return loop introduces an extra one-block latency that must be compensated. When delay compensation is active and an input is flagged as Auxiliary return (see Input Section), SPAT Revolution automatically accounts for this additional block of latency.
When to disable delay compensation: if auxiliary buses are used only for reverb or other effects where precise time alignment is not critical, disabling delay compensation minimizes the overall system latency.