Setting up DiGiCo console with SPAT Revolution
Templates can be found here: DiGiCo v1280 - SPAT Revolution 20.12 templates
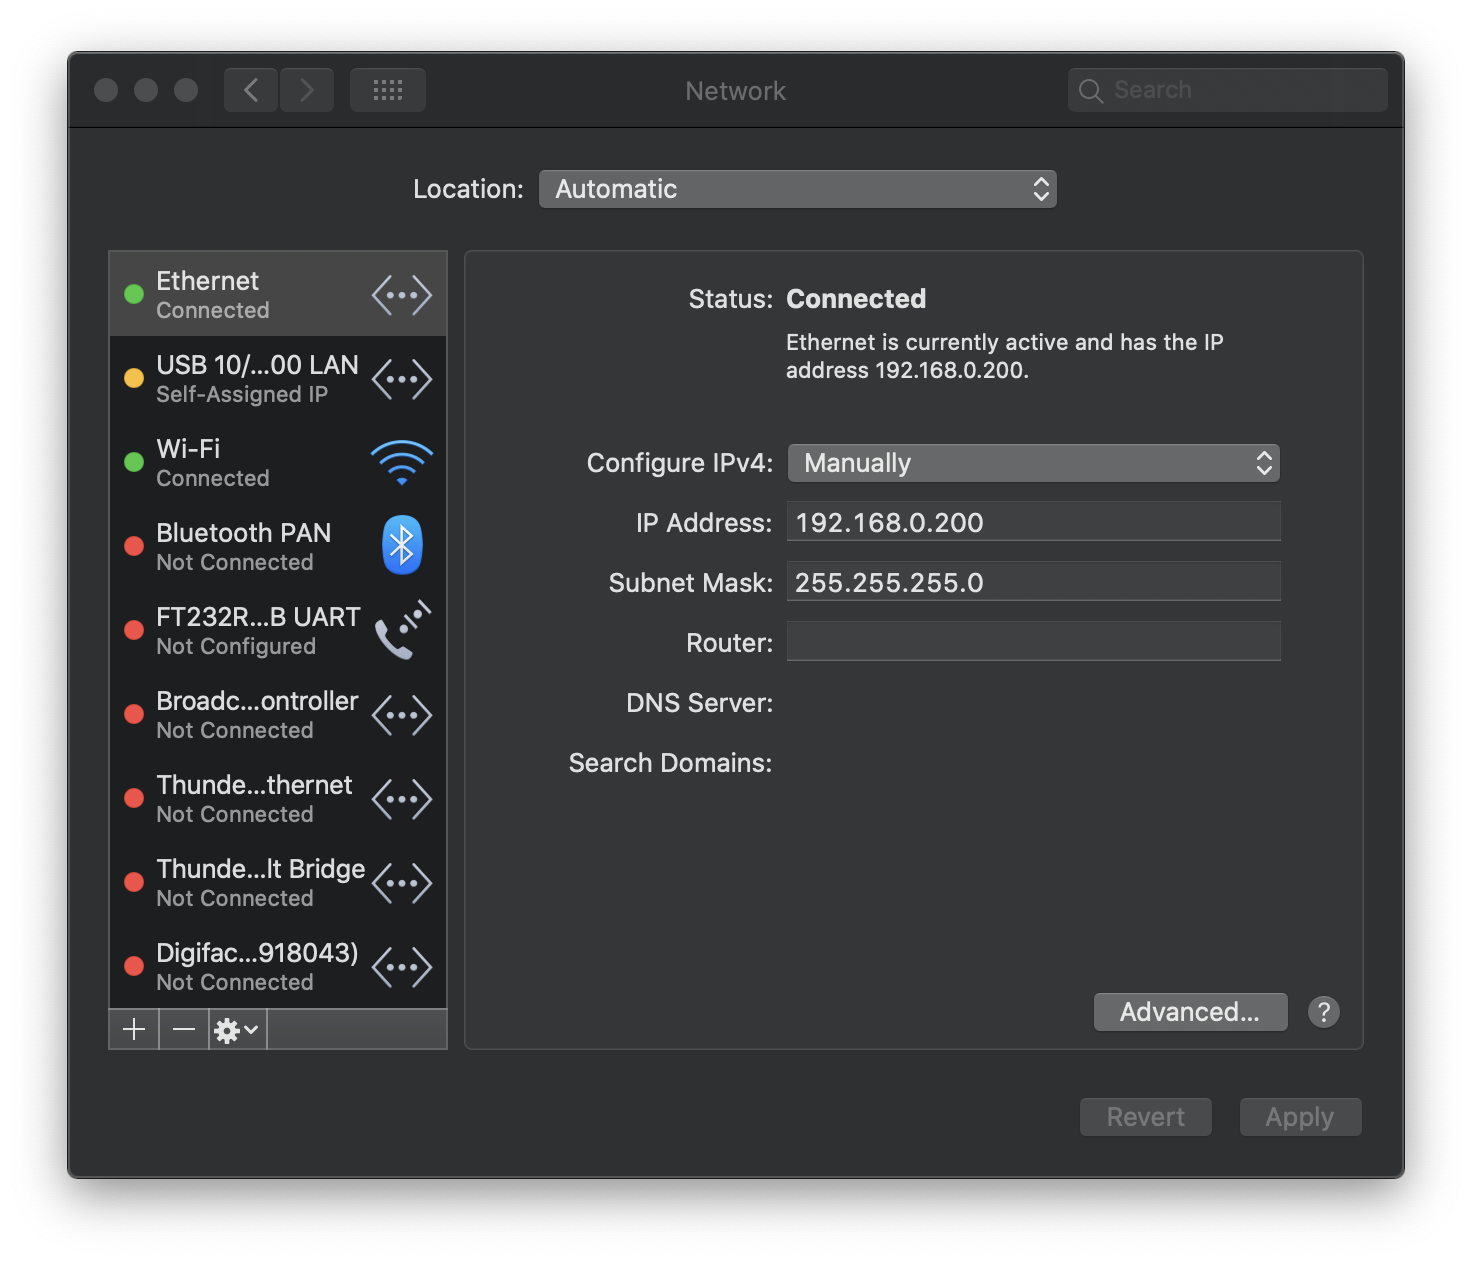
- Before starting the SPAT Revolution software, make sure you have connected your Ethernet cable between the mixing desk and the computer running SPAT. Ensure you set the correct IP settings for your local network card. In our example, we are using
192.168.0.200.
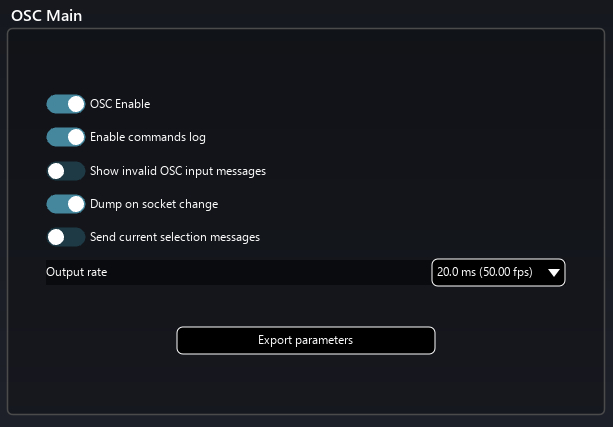
- Start the SPAT Revolution software and open the preference page.
- Enable OSC.
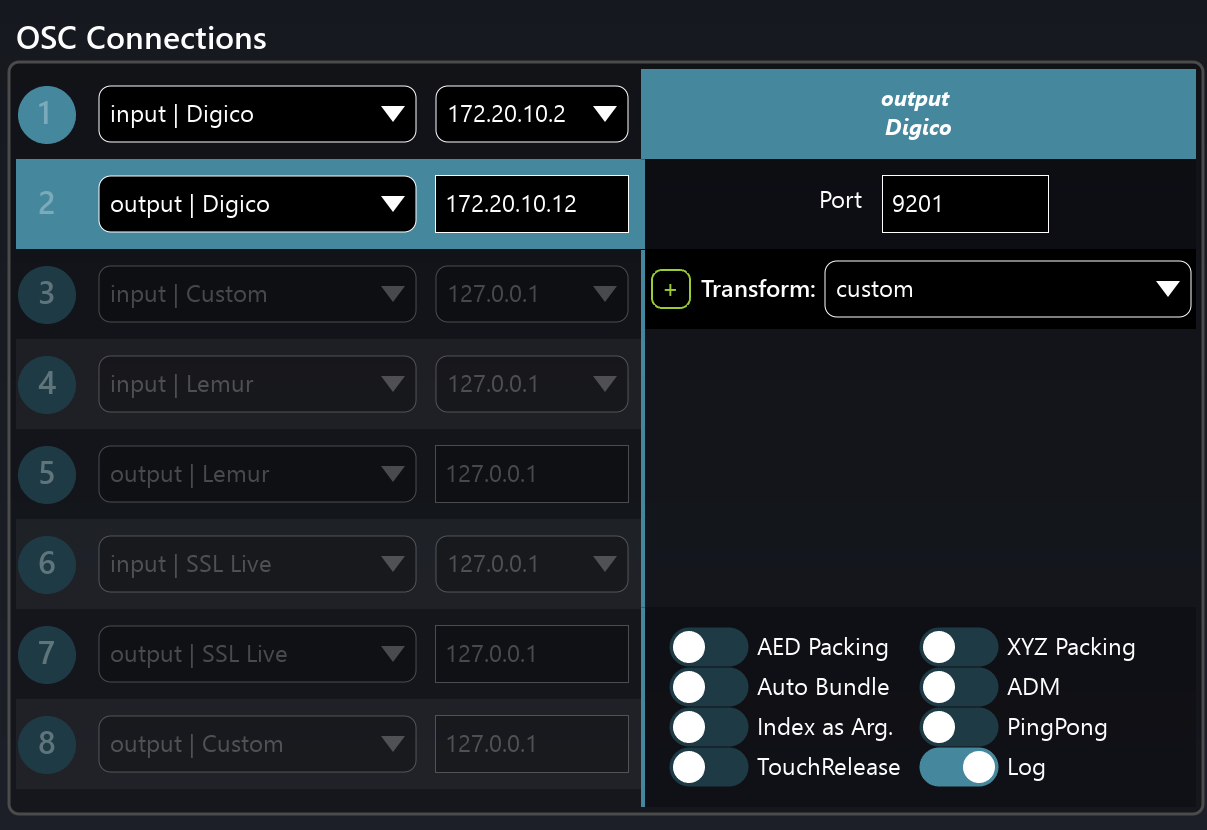
- In the OSC Connections section, use the pre-configured DiGiCo OSC presets. In the pull-down menu, choose input | DiGiCo and select your local IP address to communicate with the desk. Then, set a second OSC Connection for the output from SPAT Revolution to the desk. In the pull-down menu, choose output | DiGiCo. You will then enter the desk IP address that we will see in the following steps.
Configuration and Templates
The DiGiCo template files were created on a DiGiCo SD series using version 12.2.1280. File versions are provided for all the different console models DiGiCo makes (user can do their own conversion as well). The session files contain all the custom OSC configurations, but you need to set up the external control from the desk to SPAT Revolution, as this is specific to the hardware. This is a one-time setup for each specific console.
- Go to the Setup / External Control section of the desk.
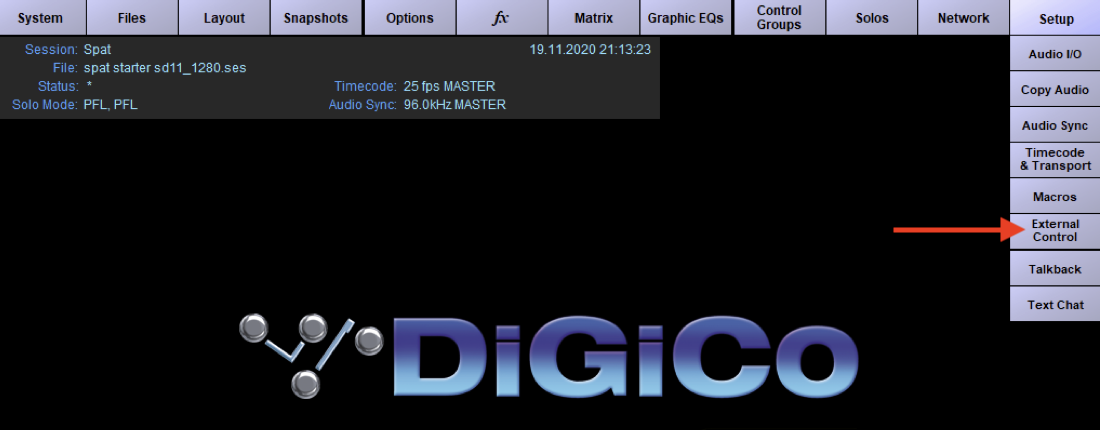
You will want to ensure Enable External Control is set to YES and the Suppress OSC retransmit is active. You will be using OSC generic for channel controllers. You are now ready to add device to configure the OSC connection. It is considered other OSC .
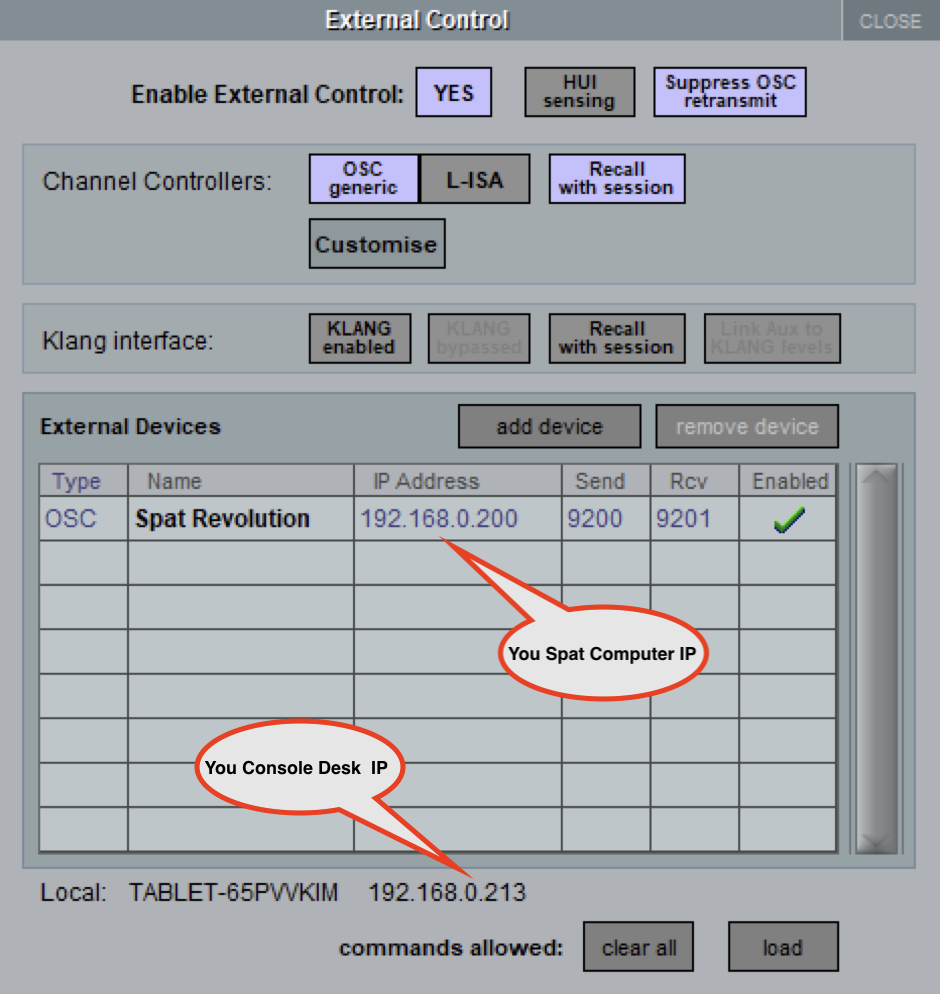
- Press add device, and give your device a name: for example, SPAT Revolution. Enter the IP address of your SPAT Revolution computer: in this example,
192.168.0.200. For port #, these are already configured in SPAT Revolution in the DiGiCo preset. On your External Device port on the DiGiCo, set the Send port to9200, Rcv Receive port is9201. Make sure that you enable the OSC device with the green check!
Settings must be done individually because they are not part of a session file. These are global settings of the desk - they stay even when you’re loading a new session file.
Now, you are ready to load the template session provided. Two session models are provided. One is for using SPAT control on all input channels; the other is for using it on groups. Group template is the one to send audio to SPAT Revolution from group stems.
After your file is loaded, you can see, for example, how to access these parameters on the desk.
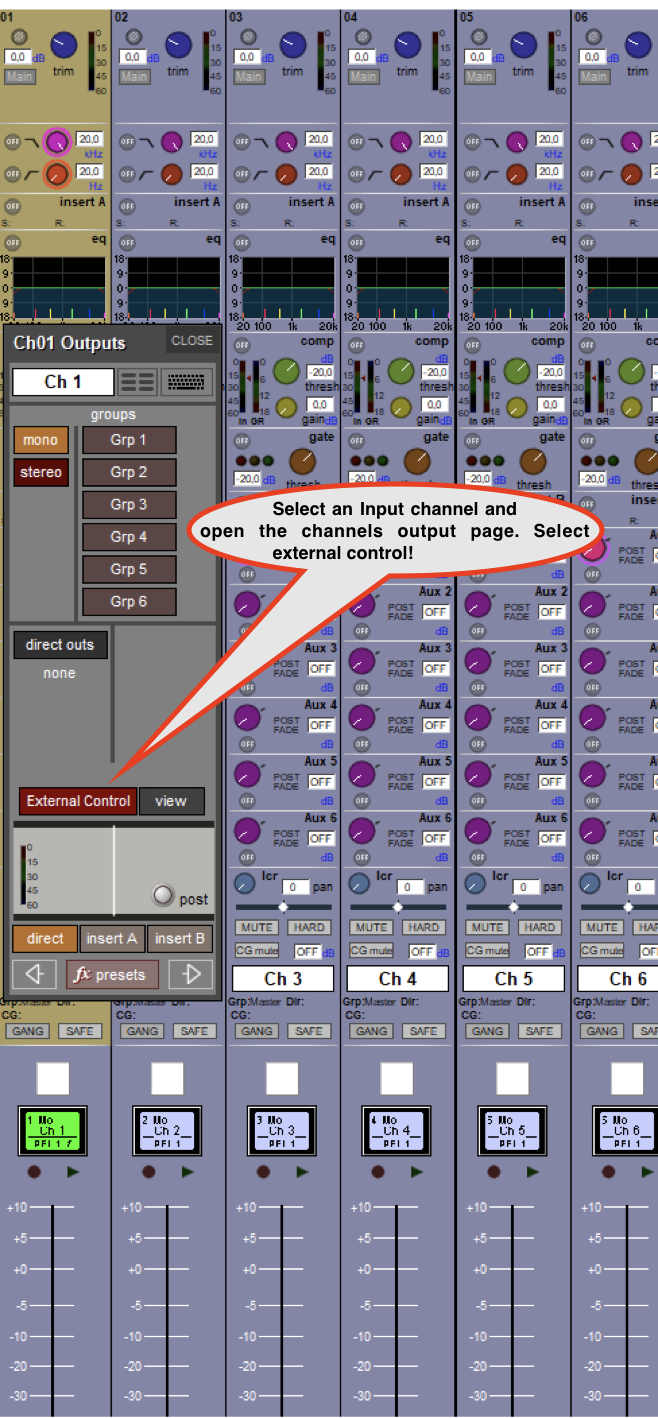
Select an Input channel and open the channel’s output page. Select external control. It will then open the external control tab. Here, you will find the predetermined most common parameters for the SPAT Revolution. A user could decide to change these if needed (for example, if rather wanting to use XYZ commands).
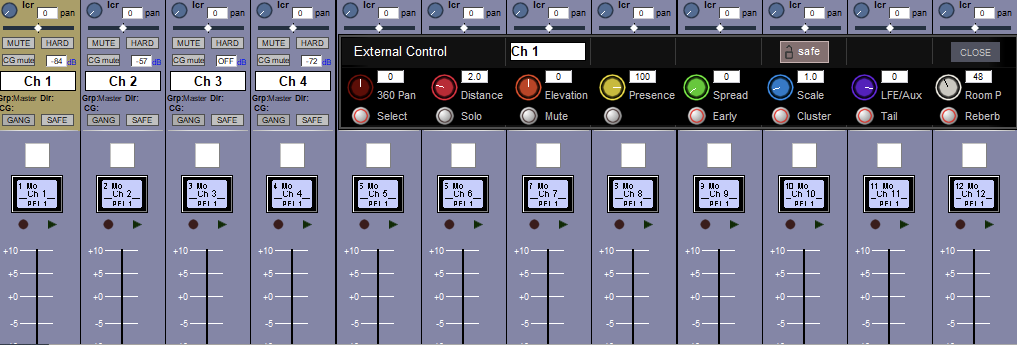
Configured in the templates are:
- Rotaries:
- 360 Pan (Azimuth)
- Distance (0-10M, default 2M like SPAT)
- Elevation (-90 / 90 degree)
- Presence (Direct Source presence)
- Spread (0-100% Spread)
- Scale (To scale stereo objects)
- LFE/Aux (Your 0.1 system aux send. The LFE)
- Room P (The presence of the room reverb/tail)
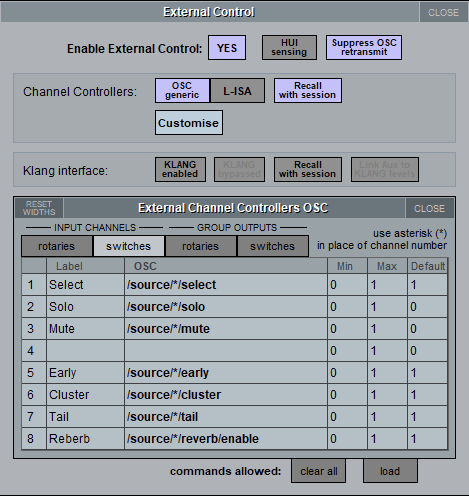
- Switches:
- Select (to select the source, by default, it will be selected when opening the External Control pane)
- Solo
- Mute
- Early (To turn on/off the localized early reflections - default on)
- Cluster (To enable/disable cluster - default on)
- Tail (To turn on/off the reverb diffused tail - default on)
- Reverb (To completely enable/disable the reverb for this source - default on)
DiGiCo OSC Generic External Control - Rotaries
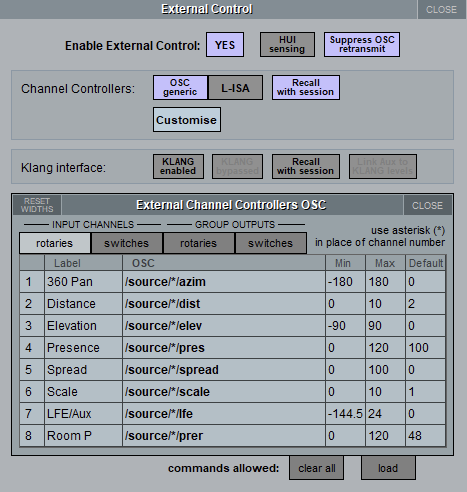
DiGiCo OSC Generic External Control - Switch
Audio routing
Your audio routing will happen either from you sending the post-fader channel direct out or the group outputs to MADI, for example, and receiving it in SPAT Revolution using a USB MADI interface (or any qualified MADI interface). These audio inputs will feed your sources/objects.
Useful tips for integration
Important: The SPAT Revolution’s source/object index numbers match the physical channels or group (1 to x) of the DiGiCo desk. This means channel or group 1 on the desk will be source/object index 1 in SPAT Revolution. The same applies to a stereo channel or a stereo group. It is a single index for a stereo element. The communication between SPAT Revolution and DiGiCo is bidirectional - so when moving an object in SPAT Revolution, you will see that the parameters are changing at the external control window of the desk and vice versa.
You can use console snapshots to create your various scenes/cues. When recalling snapshots, the external parameters will be recalled as well. DiGiCo brings a crossfade time for these snapshots, which means interpolating from one scene to the other. This is a powerful function to do crossfades.
Keep in mind that these are just global OSC recall/crossfade times. It’s impossible to set individual crossfade times for each OSC parameter by itself.
Using the Group template session, you have the exact same behavior on your groups instead of your input channels. You can send either a single channel or multiple ones as a stem to these groups and control them as a single source/object, e.g., your drum set.
Then the fun begins! Feel free to add our Lemur or any other external touch control to the equation. The fact that you can, on the desk itself, send a select command for a source means that you can rapidly select the source, and using the external control set to the -1 source / selected source gives you control right away at your fingertips. (see OSC -1 select message).