BlackTrax integration
Starting in SPAT version 1.1, a new UI implementation is available to integrate the BlackTrax RTTrPM tracking protocol in SPAT. This provides a way to map BlackTrax tracking beacons with SPAT source objects and SPAT room listeners. To do this, you will need to configure the output configuration of a BlackTrax system and have your SPAT (or multiple SPAT) computers networked on the same third-party network interface (NIC) of the BlackTrax server hardware. In the BlackTrax software, press on the output configuration button or access output configuration via the menu bar in the Settings section (shortcut Ctrl + T).


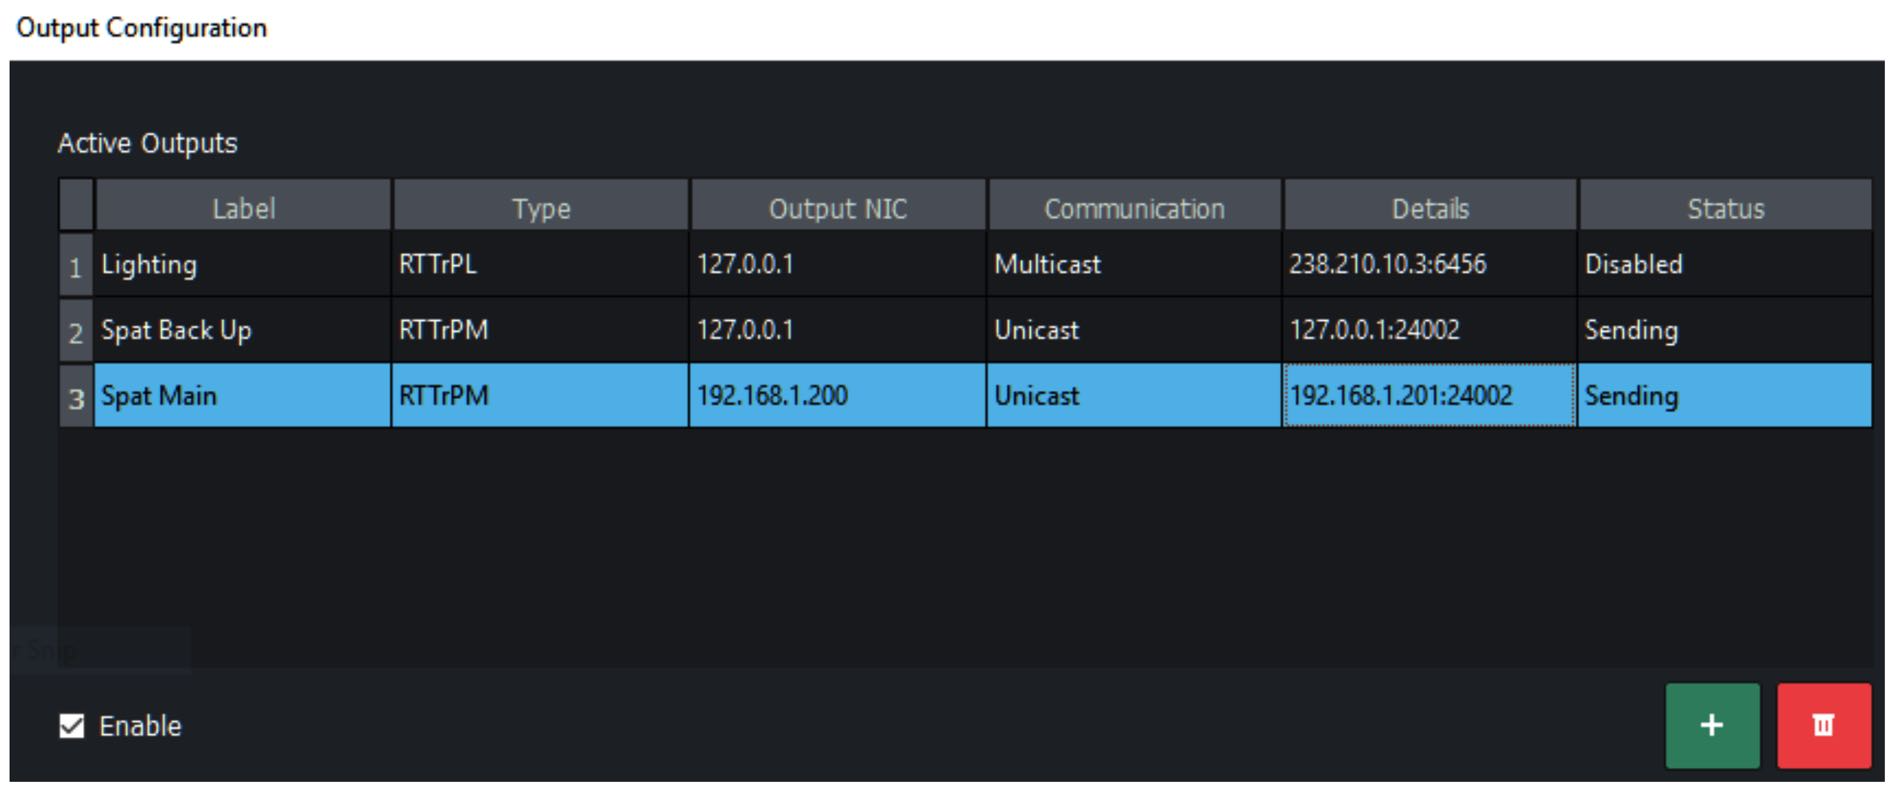
In the Output Configuration window, you must create with the + sign 1 (or multiple if running a main and a backup SPAT computer engine) output that will send tracking RTTrPM data to SPAT. Clicking the + sign will give you an edit window.
In the edit window, you will first label your output to the desired name (ex: SPAT Main). The output type will be RTTrPM, the third-party motion protocol of BlackTrax. NIC is the actual network interface that you are doing the integration to SPAT. The default NIC of the BlackTrax server for RTTrPM is 10.133.3.9 255.255.255.0. They have multiple NICs for various uses, such as lighting and the actual BlackTrax network itself. You will want to make sure your SPAT is either in the same range as this address (10.133.3.x, 255.255.255.0), or use your addresses of choice in the same range. Please consult with a certified BlackTrax support representative before attempting to change IP.
In the below example, the addresses of the Blacktrax NIC was changed to 192.168.1.200 Communication should be set to Unicast. Please refrain from using Broadcast unless there are specific circumstances. Currently, Multicast is not implemented with SPAT software. The port number should be left to the default port # 24002 as it is the BlackTrax system’s default port preconfigured into SPAT software. Press Apply and you are set with this step.
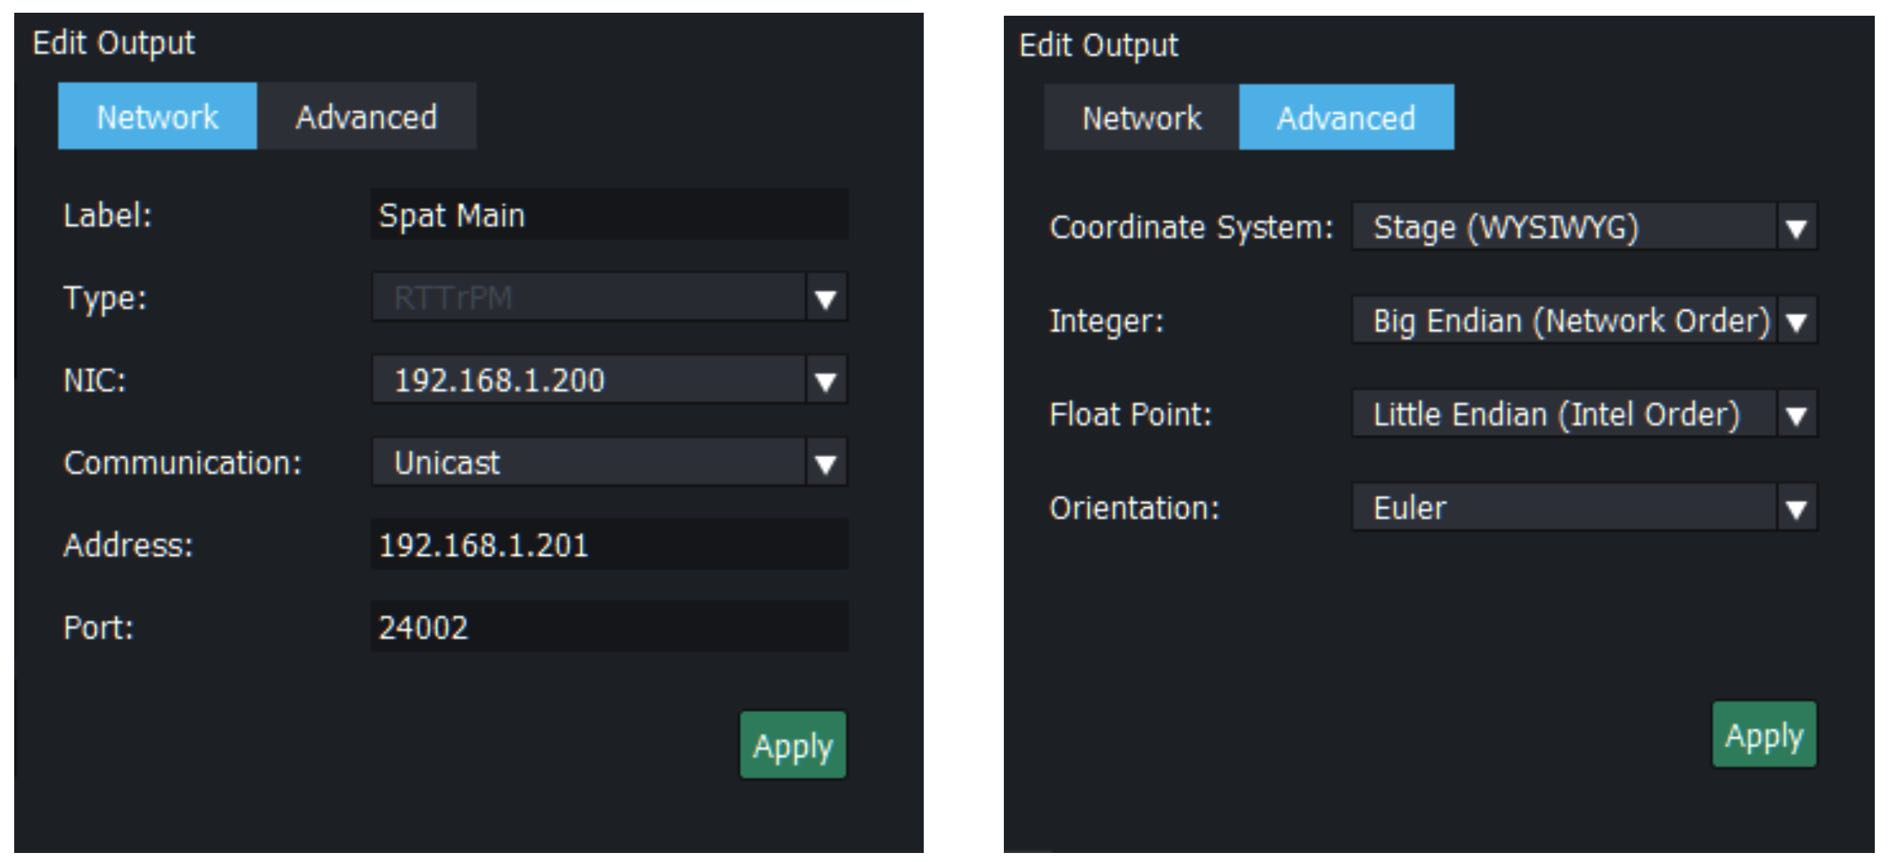
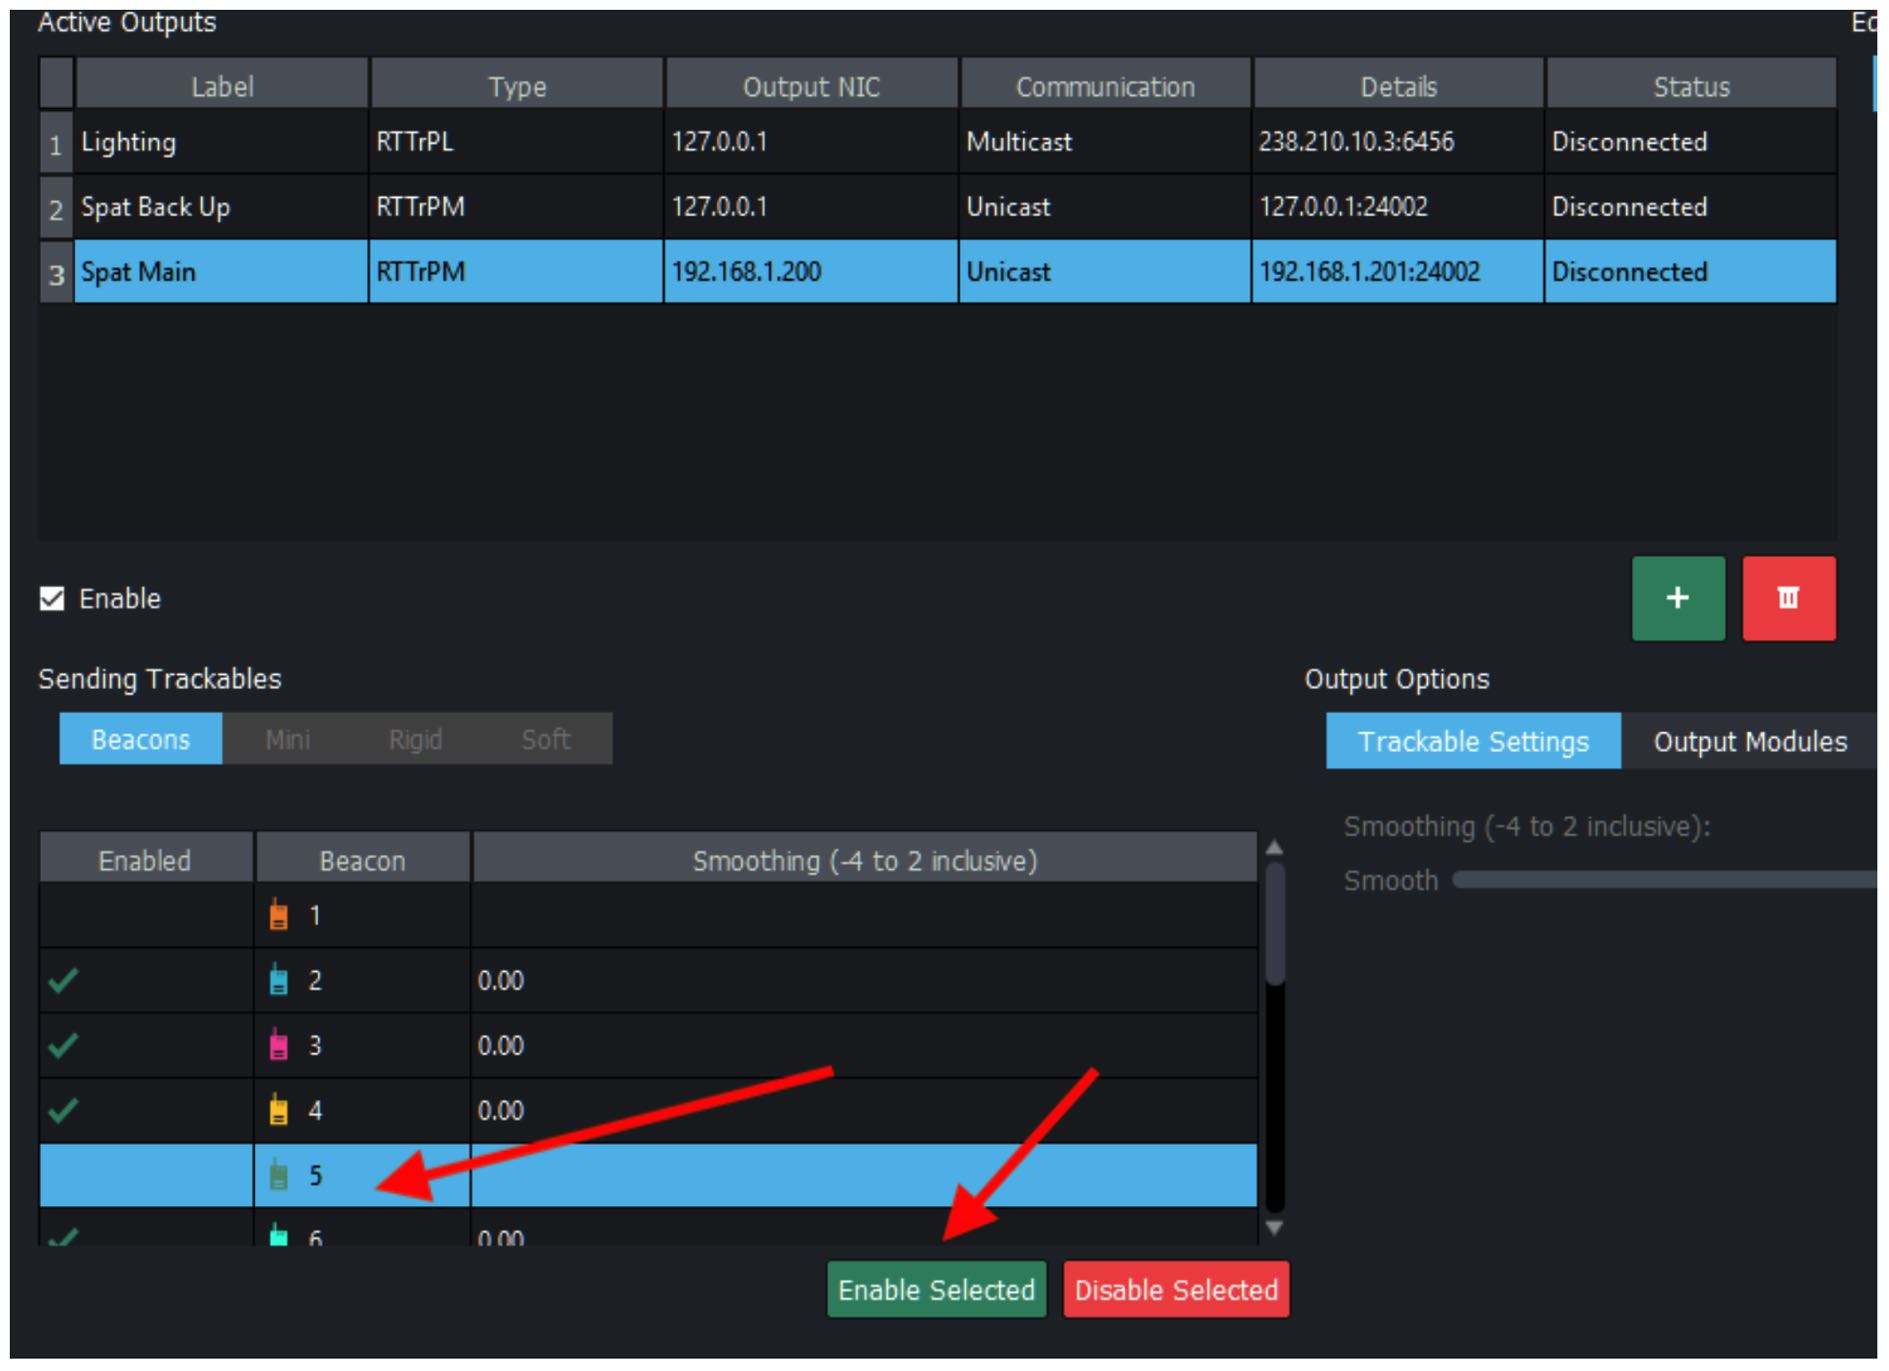
Pressing the Advanced button will give you some advanced options. Your default Coordinate System should be Stage. You can apply these settings. You are now set. Before BlackTrax will actually output anything to the SPAT system, you will need to enable the Beacons present in the system that you want to send tracking data. In the Active Output window, select your SPAT Main output. On the bottom right, select the Beacon you want data sent to and press Enable Selected. You can multi-select when pressing the CTRL key or select all with CTRL + A.
When done with all operations with BlackTrax, you want to Apply the changes to the system. You can, at this point, close the Output Configuration window and go back to the main BlackTrax page. You will want to apply the changes to the system.

You can confirm that you are sending data by returning to the Output Configuration page. The status will give you this information.

Now let’s go and configure the SPAT software. In the preference page accessible by clicking on the top right button, you can scroll down to the BlackTrax preference section.
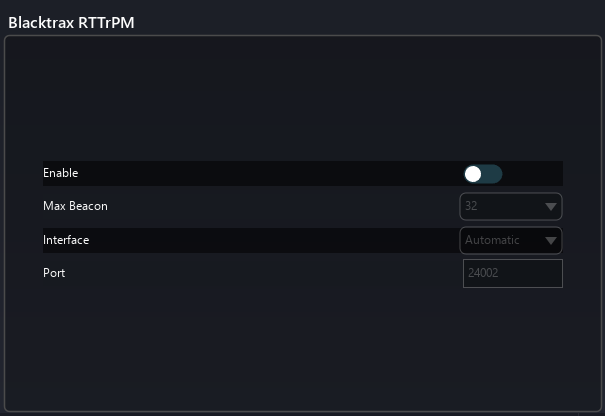
You can, from there, Enable BlackTrax RTTrPM tracking and select the amount of Max Beacon your system may need (1, 2, 4, 8, 16, 24, 32, or more). Please select the network interface you are using on your computer for the BlackTrax integration (Or leave it to Automatic) and then the port #, which is already set at the default port # used by BlackTrax RTTrPM output. You are set. These new preferences will be stored with all your preferences and remain after closing and restarting SPAT Revolution software.
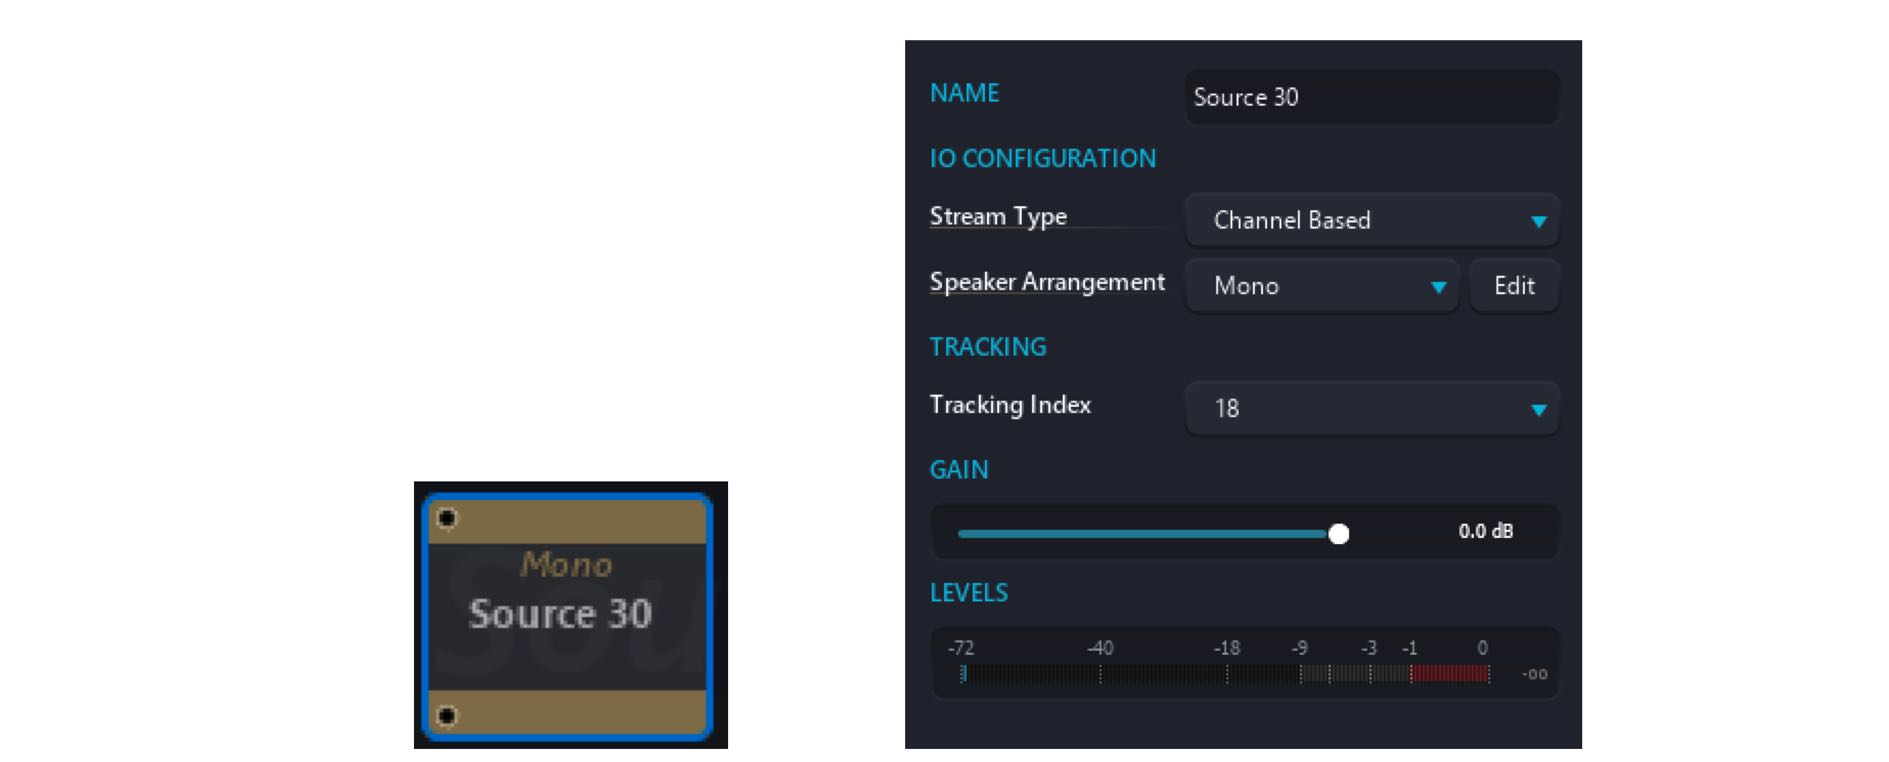
The first option is assigning a Beacon ID to an audio source object. Selecting a source will give you the source menu options. In the option are now Tracking options and a pull-down menu to choose the Tracking Index (the beacon ID number you want for this audio source). The list will be based on your Max Beacon preference. It is possible to have the same Index for multiple sources, allowing multiple sources to track a single beacon.
Your second option is to assign a Beacon ID to an actual room to track the listener’s position. Selecting a room will give you the room menu options. In the option are now Tracking options with a pull-down menu to choose the Tracking Index (the beacon ID number you want for this room listener). The list will be based on your Max Beacon preference. A Tracking Scale setting is as well provide which would allow to scale the incoming data to adjust to your speaker output setup size if needed.
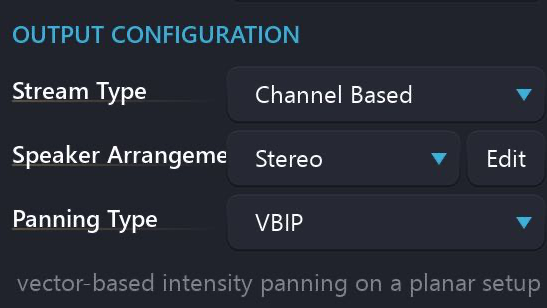
In the actual room output parameters in the room view, you will also see a tracking option become available.
![]()