ReaVolution
Credits & acknowledgements
ReaVolution was developed by Jean-Loup Pecquais, between Orléans and Paris, from 2019 to 2020.
The author would like to acknowledge a few peoples:
- Gael Martinet, FLUX:: Immersive CEO, to support and believe in this project
- Hugo Larin, SPAT Revolution product manager & business Development at FLUX:: Immersive, for his help and interest
- Nicolas Erard, to have tested almost every corner of ReaVolution and cramped my todo list with too many bugs report
- Sylvain Lambinet, which has followed this idea from the very start and always inputted some great feedback
- Justin Frankel and the whole Cockos team to have put on the market such an incredible tool.
ReaVolution is built upon the following Reaper extensions:
- SWS extension : https://www.sws-extension.org/
- JS API extension : https://forum.cockos.com/showthread.php?t=212174
ReaVolution theme uses graphical elements provided to the Reaper community by the creator of the original Reaper 6 theme, White Tie.
Introduction
What is ReaVolution?
ReaVolution is an attempt to provide a customization to Reaper standard configuration in order to simplify its integration to SPAT Revolution and provide a complete simple immersive audio creation package.
At the base of ReaVolution is Reaper, a DAW developed by Cockos. It is a very stable and fully-featured DAW with lots of customization possibilities. With its high track channel count capacities on support for any speaker arrangements, it is one of the most complete flexible DAW regarding immersive sound production.
As the default configuration of Reaper is somehow of a blank slate to create your immersive sound workflow, ReaVolution provides a start point and customization that makes any first approach to Reaper and Spat work like a charm…
ReaVolution’s goal is to solve these common problems and smooth out the transition gap for users that comes from other DAWs.
This package includes macros (scripts), customized toolbars, system behaviour preference enhancements. The ambition of ReaVolution is to give a more pleasant starting point for users that are coming from other DAW while giving a new set function dedicated to immersive audio production.
Table of content
- Installation
- Presentation
- Use cases
Installation
If you already are a Reaper user, don’t worry, ReaVolution will install itself next to your existing Reaper install. You will not loose your current customization and user data. If you wish to take some features from ReaVolution to your current Reaper install, simply use the user configuration import/export feature of Reaper.
To install ReaVolution, you need to follow this steps:
Download the latest version of Reaper on reaper.fm (currently v6.15)
Download the latest version of ReaVolution on the Flux center
Locate the place of the ReaVolution folder. For MacOS users, go to your Application folder, and found the ReaVolution folder. For Windows users, go to
C:\Program Files\Flux\ReaVolution.- On MacOS, launch the install package and drag and drop the application into the ReaVolution folder.
- On Win10, launch the install executable, choose “install as portable installation” and choose the ReaVolution folder as the install folder.
- If you already have a Reaper (> v6.xx) install, you can also copy paste the existing binary inside the ReaVolution folder.
And that’s all!
Presentation
Windows arrangement and menus
The basic layout of ReaVolution is a bit different from the default Reaper settings.
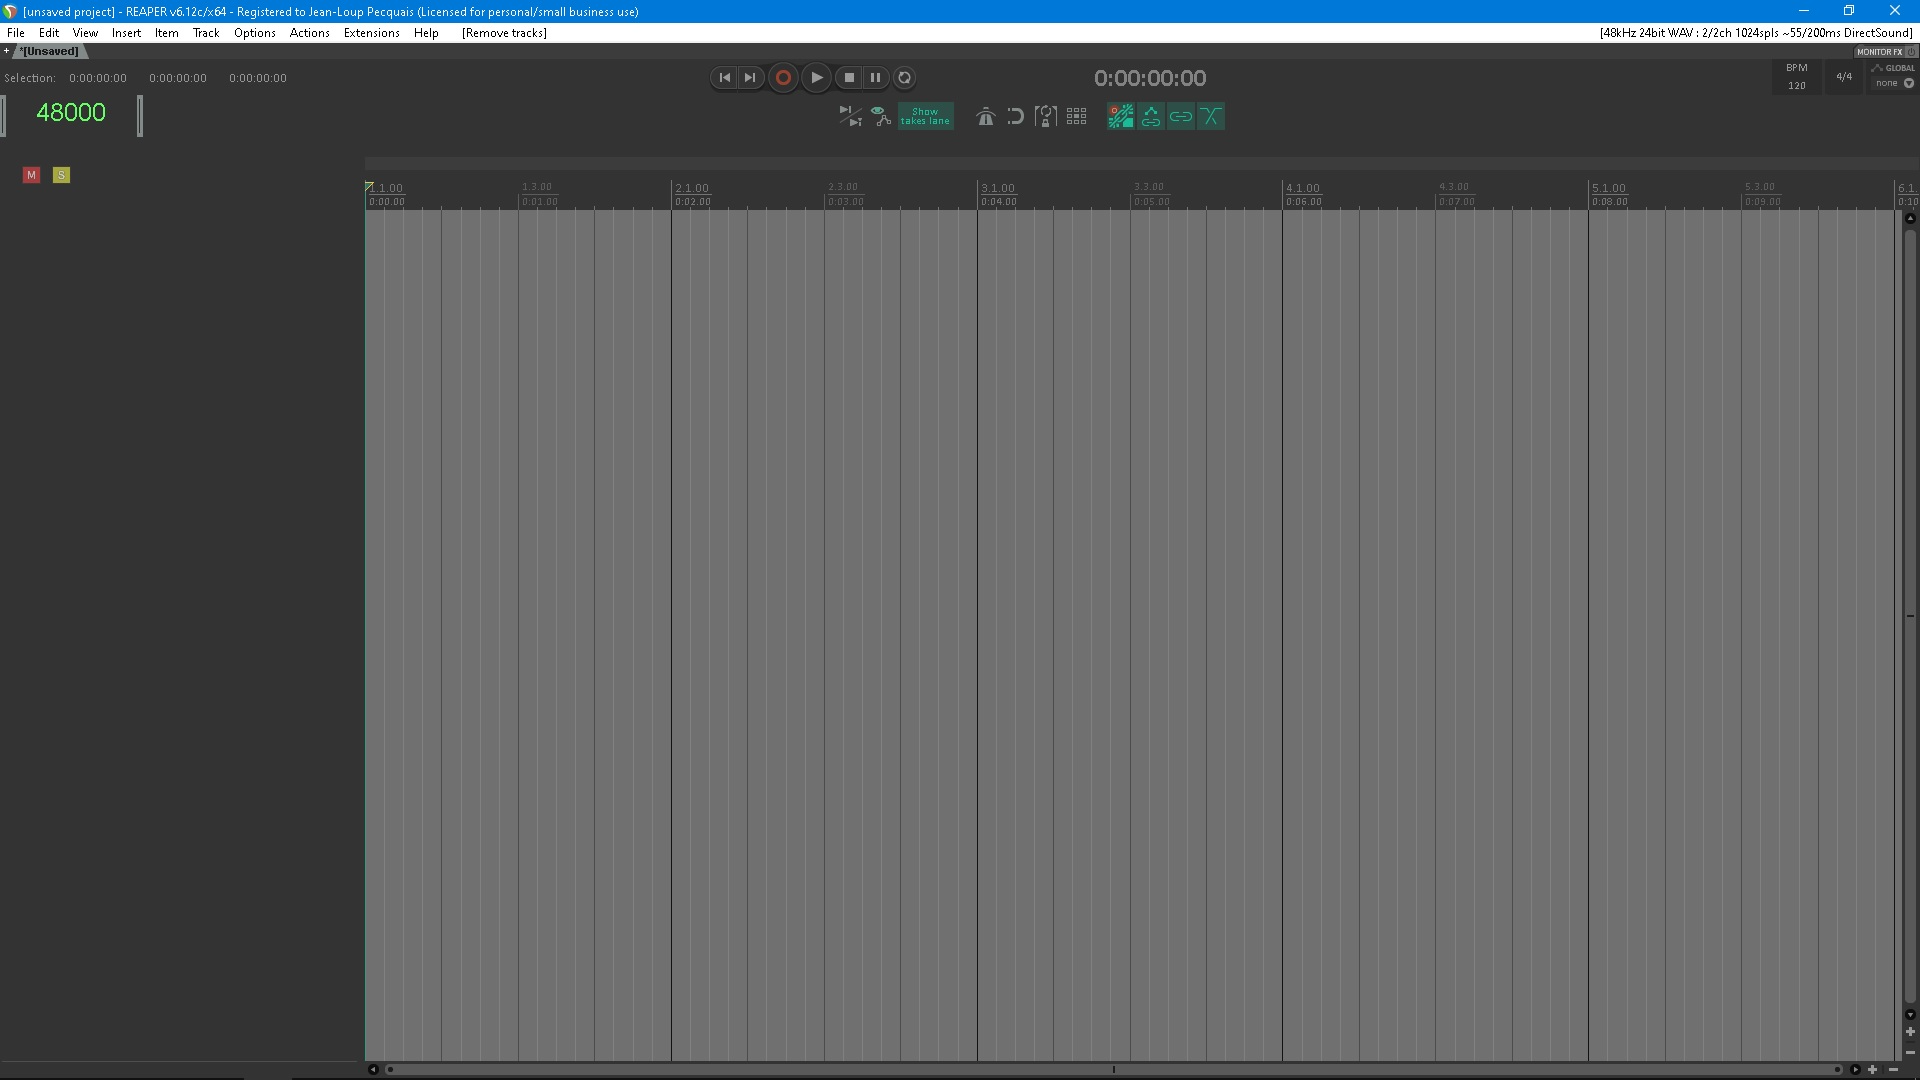
The transport bar is now at the top of the user interface. Just bellow there is the main toolbar. Here you will find all the main state you need to keep an eye on.

First is the play mode. When off, the play cursor comes back to its initial state when the playback is stopped. When on, the play cursor stays at its position when the playback is stopped.
Next, there is a command to show/hide all the automation lane.
This action is also available with the shortcut “A”
In third, we’ll find the “Show takes lane” button. As its name implies, it shows/hides the different takes. It is very useful to organize its session and only see the various take when we actually need to edit them. It is also safer to turn it off to remove any risk to change a take by clicking on a wrong spot in the arrange view.
In the middle group of icons, we’ll first a toggle to activate the metronome. A right-click on it will open a complete metronome configuration window. Next, there is the Snap toggle. It allows snapping the items we move to the grid or other items. Then, we have something less common. This icon allows locking the time selection. The last button in this group is the ripple editing mode.
The third button group contains four actions. The first one automatically group newly recorded items when on. The second one links the automation point to the item position. This means that if the item is moved, the automation point will move with it. Then there is the master group toggle. When on the item’s groups are effective. When off, all item’s groups are set to off. Lastly, the foremost right icon activates the auto-crossfade option.

On the left side of the arrangement view, above the track panel control (TCP), there are two buttons. The red “M” one is a master mute, the other one is a master solo. If at any point one of the track is muted or soloed, the respective toggle will display on. By setting it off, it clears, respectively, all the mute or all the solo.
To display the mixer, use CTRL/CMD + =
To display the midi editor, use CTRL/CMD + M
SPAT Revolution library
ReaVolution is designed to work seamlessly with the software SPAT Revolution developed by FLUX:: Immersive. SPAT Revolution is a stand-alone application to create immersive sound content and support almost any surround sound technologies. FLUX:: has also developed audio pipe technologies which allow sending audio from a DAW to SPAT Revolution using a VST/AAX/AU plug-ins. This is a very powerful tool, but it can be quite time-consuming to setup.
ReaVolution comes with a set of action that automates all the things that needs to be done prior to sending audio from Reaper to SPAT Revolution and work in pairs with the Audio Stream library to support any channel configuration.
Audio Stream library
This library is the core of ReaVolution. Its goal is to provide a way to overcome the limitation that Reaper imposes on track format. By default, tracks and channels can only be even numbers. But in the real world, numerous audio streams come in odd channel numbers, mono being the really obvious one.
How does it work? the library uses the combination of a JSFX called “Audio Stream” and some scripts. This JSFX is present on every track and is used to store and display the stream type to the user. It supports the same streams as SPAT Revolution: channels based, HOA, Ambisonics, binaural and transaural.
Various library
Routing library
ReaVolution comes with some powerful macro to quickly manage your routing task: sending tracks, creating busses, folders, you name it. It uses the Audio Stream library to support any kind of channel arrangement and be fully compatible with an immersive sound workflow.
Editing library
One of the concerns of ReaVolution is to provide an editing experience closer to the industries standard. Editing is certainly with what most of the new Reaper’s user are struggling with. This library takes its inspiration in softwares that have made their proof in editing task: Pro Tools, Pyramix & Live.
DDP library
This one is a little bonus. It actually was the first one done to satisfy some frustration of the author. Reaper comes with the full support of DDP files, but it is not very easy to create markers and editing them. This DDP library aimed to solve this with a simple set of scripts.
Use cases
Creating sessions
Each new created track comes with a JSFX Audio Stream plug-in inserted. It does not process audio : it is a simple pass thru. If we open it, we will find no parameters to set and only GUI that display a number of channels/order and a color code that represent the stream type. This GUI is by default shown in the Reaper mixer (also called MCP).
To create a new track, you can either double-click in an empty part of the MCP, or of the TCP. You can also hit CTRL/CMD + N or CTRL/CMD + Shift + N to insert multiple tracks.
All this new tracks are by default mono tracks. We can insert track to a precise format by right-clicking in an empty area of the MCP or TCP and by searching the “Audio stream::insert track” menu. Inside you’ll find all audio format supported by the Audio Stream library.
In the same vein, we can set the audio stream of an already created track by right-click on it and going to the menu “Audio stream::set to”. This can also be done for a selection of tracks.
If you are working on a session that has not been created with ReaVolution, you still can use the “Audio stream::set to” menu. It will insert an Audio stream plug-in on each selected tracks.
Inserting an Audio Stream plug-in will not be sufficient to display the stream type in the MCP. You have to right click on the instance and select “Show embedded UI”.

When defining a channel based audio stream, you can either enter a number of channels (12 for example) or enter a speaker arrangement (5.1, 7.1, 7.1.4, 22.2 etc…).
You can also right click in an empty space of the mixer and select “Audio Stream::Insert track”. A pop up window will ask you how many tracks of the selected audio stream type you want to insert in your session.
Dealing with routing
Creating auxiliary tracks
To send tracks to another one, we have three shortcuts : one for post-fader, one for pre-fader and one for pre-fx.
A new auxiliary track gets his audio stream info from its source track. In other words, if you create an auxiliary track for a A-Format track, the destination track will also be A-Format.
Shortcuts:
ALT + S → Create auxiliary track (post-fader) ALT + Shift + S → Create auxiliary track (pre-fader) ALT + Shift + CTRL/CMD + S → Create auxiliary track (pre-FX)
Creating busses
In Reaper, the concept of busses is merged with the concept of folders. A folder track has children tracks which are, by default, routed to their parent.
To create a bus, select the desire tracks to group and hit the command CTRL/CMD + G
A bus created with this command checks the audio stream of each track and adjusts its number of channels to fit them all. It also looks at the parent channel of each track. For example, if you have one mono track going to 3-4 channels and another one going to 5-6 channels, it will create a bus routed to 3-4 and reroute the child track to 1-2 and to 3-4.

Creating multi-busses
This is a new concept brought by ReaVolution.
When working with software like SPAT Revolution, we often encounter one problem. Let say we have a drum kit recorded with four microphones: kick, snare & stereo overheads. A common mixing workflow is to create a summing bus and do some processing on it (compression and/or EQing). But then, we can only fed a summed stream to SPAT Revolution and we cannot spatialized each element independently.
Here comes the multi-busses. It is a simple trick actually. If we create a multi-bus from our drum kit, it will create a folder track where the kick is routed to channel 1, the snare is routed to channel 2 and the overhead are routed to channel 3-4. So each element has its channel so nothing is summed here.
Now the trick is to use multichannel compatible plug-ins such as the Flux:: Immersive suite. Their compressors allow to “link” channels to have the same detection signal for all the channels.
This way we can have “bus-like” processing without losing the possibility of spatializing each element.
To create a multi-bus, select the desire tracks to group and hit the command CTRL/CMD + ALT + G
Sending tracks to SPAT Revolution
As discussed bellow, it is possible to send and receive audio to and from SPAT Revolution with the help of SPAT Revolution plug-ins suite. The “Send” plug-in allows to send audio from the DAW to SPAT and the Return plug-in receives audio from SPAT to the DAW.
Without ReaVolution, there is a certain number of things to do prior to correctly use this plug-ins. First, each track hosting a Send plug-in has to be routed to each track hosting a Return. This has to be done to be sure that the DAW does not process a “return track” before a “send track”.
Then, each track hosting a SPAT plug-in has to be set to “prevent anticipative fx processing”.
When all this set-up is done, we can guarantee a good sync between Reaper and SPAT Revolution. But it can be quite tedious to do manually.
ReaVolution comes with an action that do all of this automatically. With the help of the Audio Stream libraries, it does all the routing automatically. It can even handle multi-bus and access to child tracks’ information.
This action is found by right clicking on a track, inside the menu “SPAT Revolution”. It is called “Route selected tracks to SPAT Revolution”. This action will create a new auxiliary for each selected track, with the right routing, the right configuration and a SPAT Revolution Send Plug-in inserted.
After running this action, you should be done at least at 95% of your configuration.
Receiving audio from SPAT Revolution
To receive audio from SPAT Revolution, simply create a track at the wanted format using “Audio stream::insert track”. Then, go back to the “SPAT Revolution” menu by right-clicking on the track we just created and choose “Receive audio from SPAT Revolution on selected track”.
You will find an option related to SPAT routing in the top bar menu, under Extension>ReaVolution>When tracks are routed to SPAT.
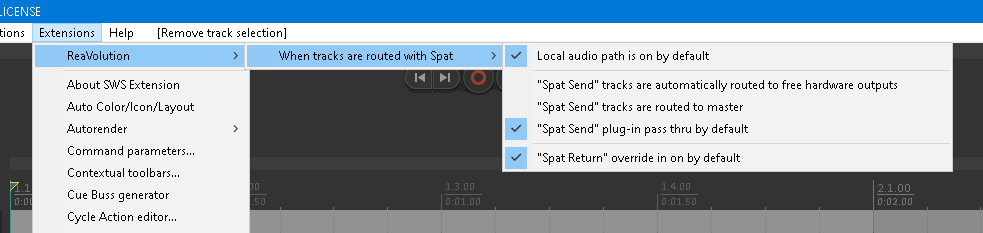
This option allows to configure the default behavior of sending audio to and receiving audio from SPAT Revolution. By default, the local audio path, which allows sending audio from Reaper to SPAT using virtual audio pipe, is on, the same as the thru option of SPAT send plug-in and the override option of SPAT Return plug-in.
Editing audio
The editing workflow of ReaVolution has been thought to be simple and straightforward.
First thing first, we need to discuss briefly about the basic mouse behavior in ReaVolution :
Left click/left drag : select time & items Right drag : select only items Middle click : change edit/play cursor position
Using the mouse
In ReaVolution, some scripts try to simplify the editing behavior. It tooks its inspiration from various DAWs, such as Pro Tools, Pyramix and Cubase.
Items are now divided in two halfs. The top half handles the selection action and the bottom half handles the movement action. It is also displayed to user : when the mouse is over the bottom half of an item, the mouse cursor change to a “hand” cursor.
By default, ReaVolution makes the time selection and the loop selection totally independent. The time selection is drawn by left dragging the mouse over the arrange view or the top half of items. The loop selection is drawn by left dragging the mouse in the ruler.
Regarding the time selection, it is now quite volatile and easy to clear. A simple click in the arrange view will clear it. The only exception is to click on the bottom half of an item inside the time selection.
You will also notice that the play/edit cursor is know very static. To move it, you can either left click in the ruler of the use the middle click of the mouse in the arrange view.
Moving items
Items can be move by simply dragging them by clicking on the bottom half. It is also dependent on the time selection. There is no need to cut the items prior to move part of them. If the time selection is longer than the selected items, the time selection is trimmed to adjust to the item selection.
Advanced mouse usage
- Selecting time between two items
Double clicking in an empty area of a track selects the time between two items or between the beginning of the session and the first item on the track.
- Quickly move items
ReaVolution has some quick way to move items to the play cursor:
W : move the start of the selected items to the cursor position
X : move the end of the selected items to the cursor position
< : move snap offset of the selected items to the cursor position
You can set the snap offset of an item by using the mouse modifier SHIFT+CTRL and by clicking on the top half of the item.

- Automatic ripple edit
Ripple edit is a very powerful feature to quickly edit and move lots of items. The problem is that forgetting to turn it off can do a lot of damage to a session.
ReaVolution comes with a set of shortcuts and mouse modifiers that take advantage of ripple editing without having to engage or disengage it.
SHIFT + Left click : move item with ripple edit on all activated tracks SHIFT + CTRL/CMD + Left click : move item with ripple edit on selected tracks CTRL/CMD + Backspace : delete content of time selection CTRL/CMD + SHIFT + Backspace : delete content of time selection on selected tracks
Using the keyboard
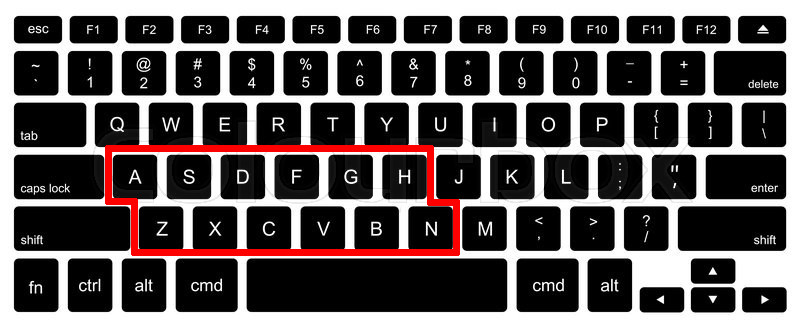
ReaVolution comes with a complete set of shortcuts to easily edit audio items. To make it really simple, a zone of the keyboard is dedicated to editing.
To keep things logical, there is two sets of shortcuts provided by ReaVolution : an AZERTY one and a QWERTY one. By default ReaVolution is set in AZERTY. To change this layout, go to the action list (shift+?), click on “Key Map” and choose “Import shortcut key map”. In the newly opened explorer/finder window, choose the desire ReaVolution key map file. This key maps only affect the shortcut shown in this section.
Mouse editing :
B : split item N : insert stretch marker H : Heal split in item G : group/ungroup items D : set item fade in F : set item fade out A or Q : trim item start S : trim item end Z or W : set time selection start X : set time selection end C : “special copy” V : “special paste”
With all of this, you should already have most of your editing workflow. There is a few ones more that depend on the cursor or time selection :
CTRL/CMD + B : split all items that cross edit cursor or time selection ALT + B : trim selected item(s) to time selection CTRL + D : duplicate items (follow time selection) BackSpace or Delete : Remove items (follow time selection)
Three and four points editing
When we need to edit big chunck of audio, across multiple takes, it’s hard to beat Pyramix. It uses a “source-destination” system. Sources are the different takes and destination is our final editing. To do the actual editing, we set a time selection inside the source and put a cursor in the destination (3 points edit). The selected time selection will be copied at the destination cursor, moving later destination items further. Or we can also set a time selection for the sources and the destination (4 points edit). This way the selected source will be paste inside the selected time of the destination.
ReaVolution supports a similar way of editing with the shortcut C, V and ALT+V.
C : copy source items V : paste source items at cursor position (move later items) ALT + V : paste source items inside the time selection
Zoom and movement shortcuts
R : Zoom out arrange view T : Zoom in arrange view Mousewheel : Scroll thru tracks SHIFT + mousewheel : Scroll in the timeline CTRL/CMD + mousewheel : Zoom in/out arrange view ALT + Z : Go back to the last view/zoom position
Some various useful shortcuts
These last shortcuts are not directly related to audio editing, but it can help with this task anyway.
CTRL + ALT + Mousewheel : Waveform Zoom In/Out Shift + S : Toggle solo for selected tracks Shift + M : Toggle mute for selected tracks or selected items Shift + R : Arm/disarm selected tracks for recording CTRL/CMD + A : Select all items/all tracks CTRL/CMD + SHIFT + A : Select all items in time selection CTRL/CMD + R : Create a new region based on time selection M or Enter (num.) : Insert a marker at current position 0 : Toggle mute for selected items Alt + R or 3 : Record