Understanding the mixing zones
The whole mixing experience of SPAT Revolution takes place in the 3D view. Creating a mix this way is really simple: simply grab a source and move it where you want it to be. But there are a few subtleties that are important to get right.
The first important thing to understand is that there are two main zones in the SPAT Revolution 3D view:
- One inside which you should put sound sources in: the efficiency zone.
- One inside which you shouldn’t: the protection zone.
Whether you are working with a room using channel-based or not, or depending on the speaker arrangement, these zones will have different shapes and usages, which we will discuss below.
The protection zone
The protection zone is a volume around the listener position inside which sources are automatically repositioned. It exists because most spatialization techniques cannot create the illusion that a sound comes from in front of the speakers (WFS being a notable exception) — so you should generally avoid placing sources inside this zone.
When a source enters the protection zone:
- Its presence factor stops changing — the distance no longer affects the source’s level or brightness. The attenuation model (including air absorption) reaches its threshold at the zone boundary.
- The source is repositioned to the closest point on the zone surface, preventing it from passing through the listener position.
Zone shape
The protection zone can take different shapes to match your speaker arrangement:
- Ellipsoidal (default) — A smooth, rounded shape. When Width, Depth, and Height are all equal, the zone is a perfect sphere.
- Rectangular (parallelepiped) — A box-like shape with sharp corners.
- Hybrid — Any blend between ellipsoidal and rectangular, controlled by morphing percentages.
The shape is controlled by three size parameters and four morphing percentages:
- Width — The zone size along the left/right axis (X).
- Depth — The zone size along the front/back axis (Y).
- Height — The zone size along the top/bottom axis (Z). Setting this to 0 creates a flat 2D zone in the horizontal plane.
- Front Top / Front Bottom / Rear Top / Rear Bottom — Four independent morphing percentages (0–100%) that control the shape of each quadrant of the zone. At 100%, the quadrant is fully ellipsoidal (smooth). At 0%, it is fully rectangular (sharp corner). You can set each quadrant independently to create asymmetric shapes.
This flexibility allows you to create shapes that accurately match real-world speaker arrangements. For example, you could flatten the frontal part of the volume to take into account a stage.
Note that the azimuth parameter rotate the source by keeping it constant distance from the protection zone. This assure that the level of the source does not vary when changing the azimuth angle.
Source behavior inside the zone
The Source over listener head parameter controls what happens when a source enters the protection zone on a 3D speaker arrangement:
- When enabled (default) — The source is pushed upward in elevation as it tries to enter the zone, following the surface of the protection zone. The source is then processed at its elevated position.
- When disabled — The source keeps its current elevation and is simply projected to the closest point on the zone surface.
In both cases, reaching the protection zone boundary means the distance-based attenuation model has reached its threshold.
The Source over listener head option is only available when the zone has a non-zero Height. In 2D mode (Height = 0), there is no overhead direction, so this option is automatically disabled.
The presence of a source
A sound source in SPAT Revolution has a presence factor. It defines its overall level and brightness inside the virtual acoustic space. Many parameters can change this presence factor:
- The distance between the source and the protection zone
- The presence parameter
- The drop factor
- The Air absorption
Putting a source closer or further away from the protection zone will have the consequences of modifying the presence. The closer the source is, the more presence it has. The farther it gets, the less presence has a source.
The presence parameter directly affects the presence factor of the source.
The drop factor defines the relation between the loss of presence and the distance between the source and the protection zone. It is set by default to follow the acoustic law of our world, where we lose 6 dB of presence each time we double the distance.
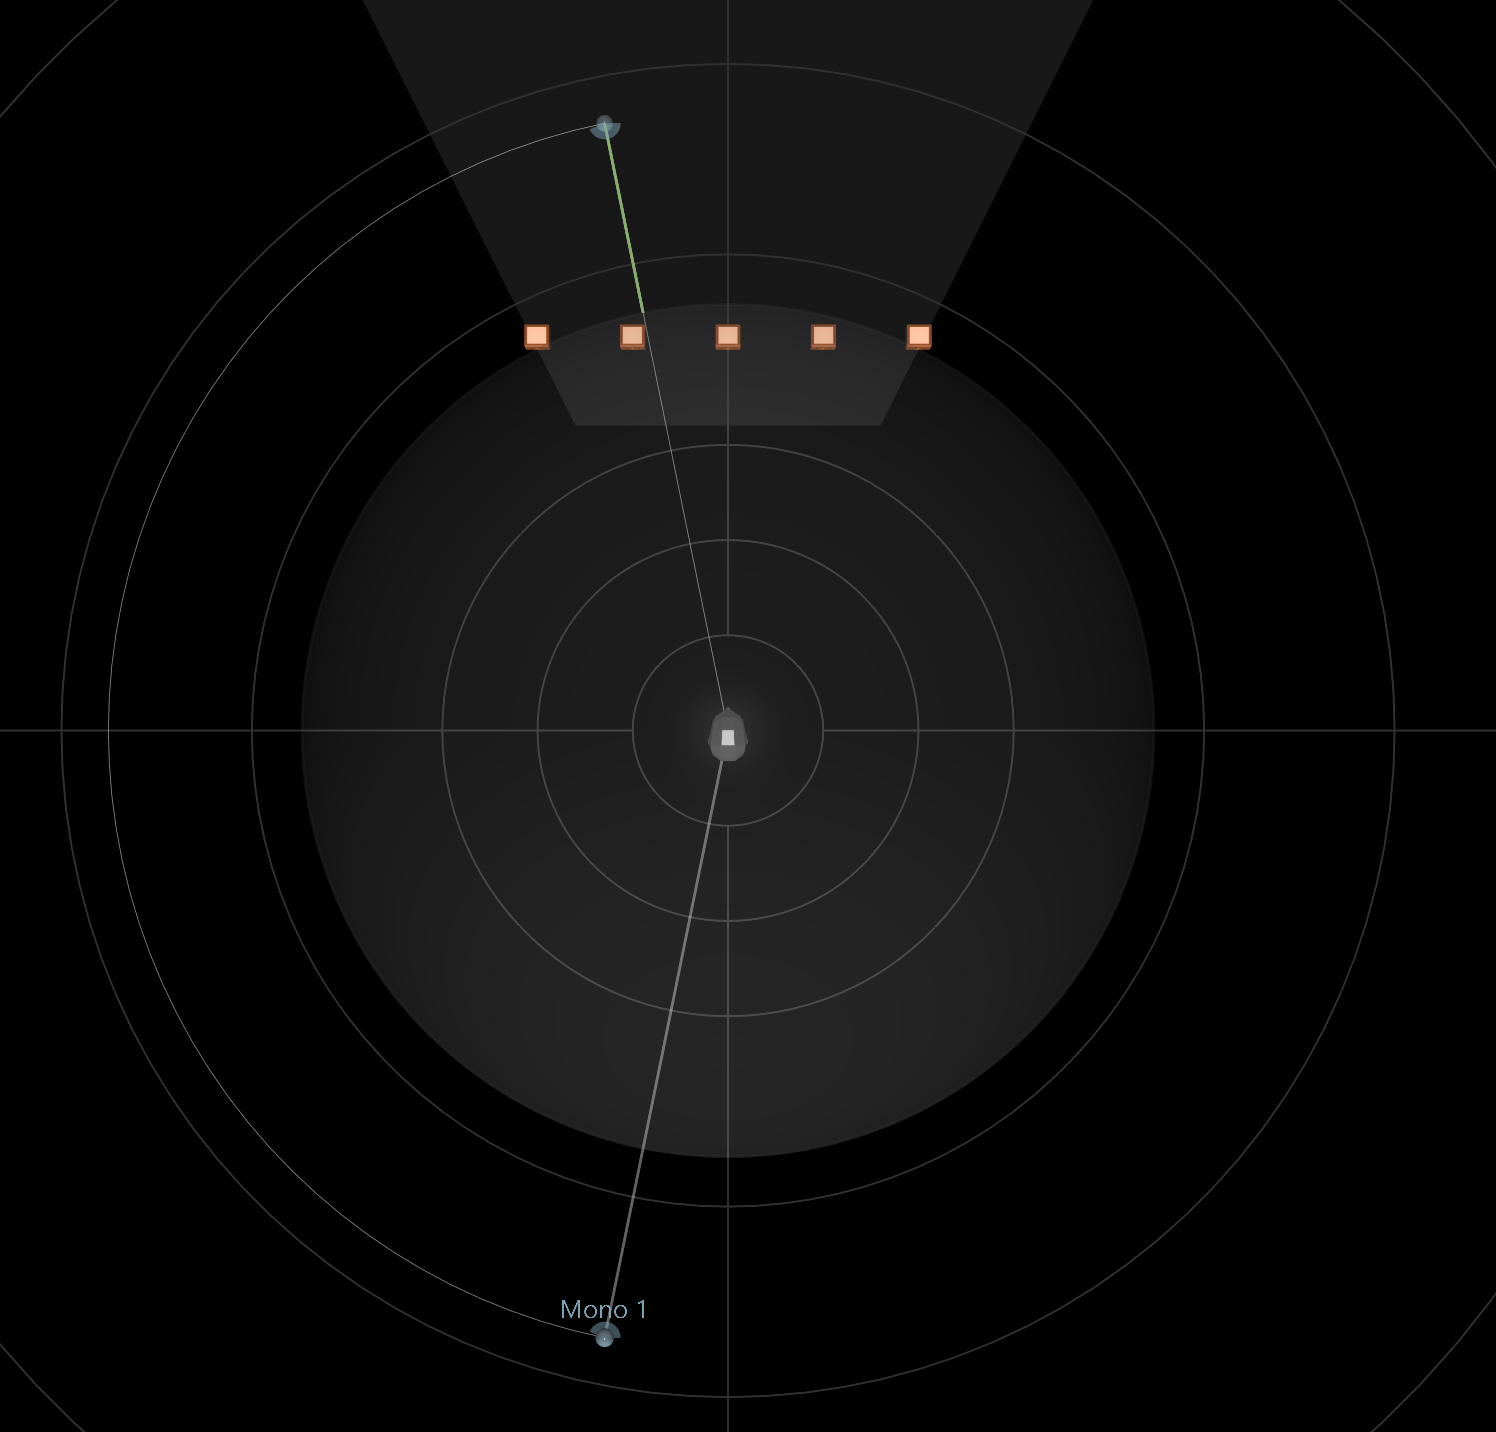
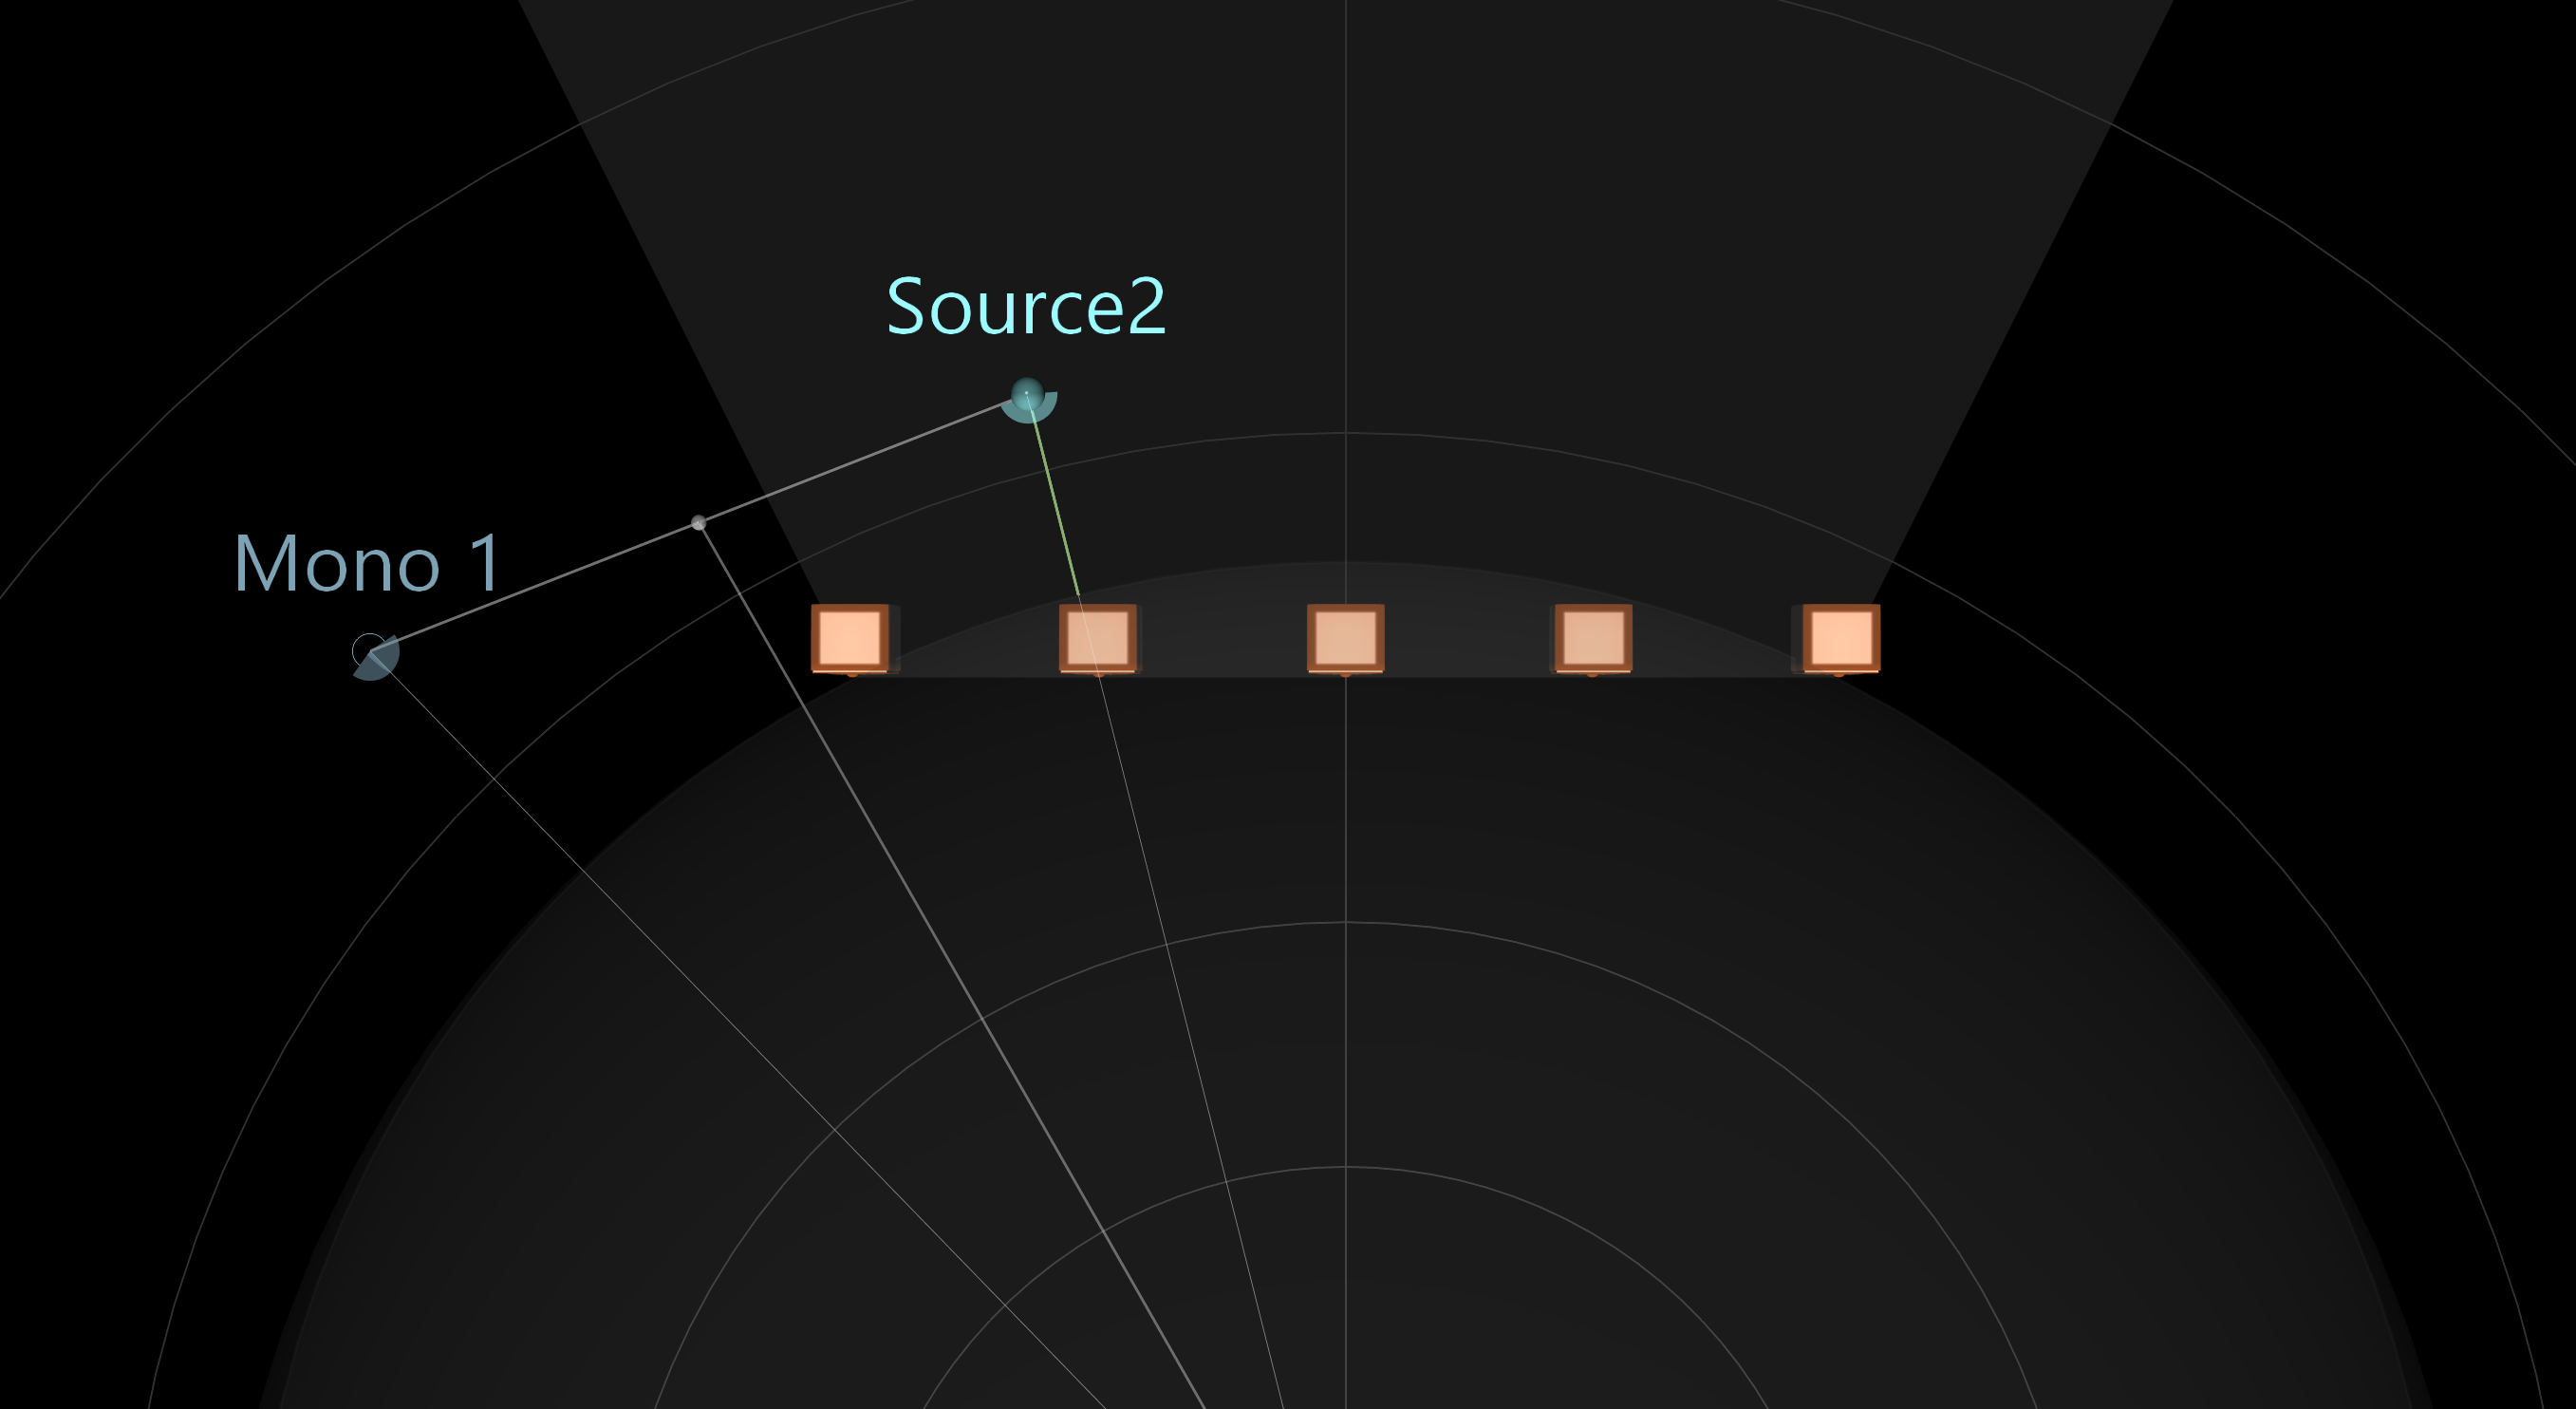
When Presence infos on the top bar of the 3D view is enabled, the overall presence of a source is displayed by a green vector, drawn between the source and the protection zone. The intensity of the green color is proportional to the presence factor. If the source is inside the protection zone, the vector will turn red and a small sphere of the same color will be drawn on the surface of the protection zone.
While a source is in the protection zone, there is no variation in presence.
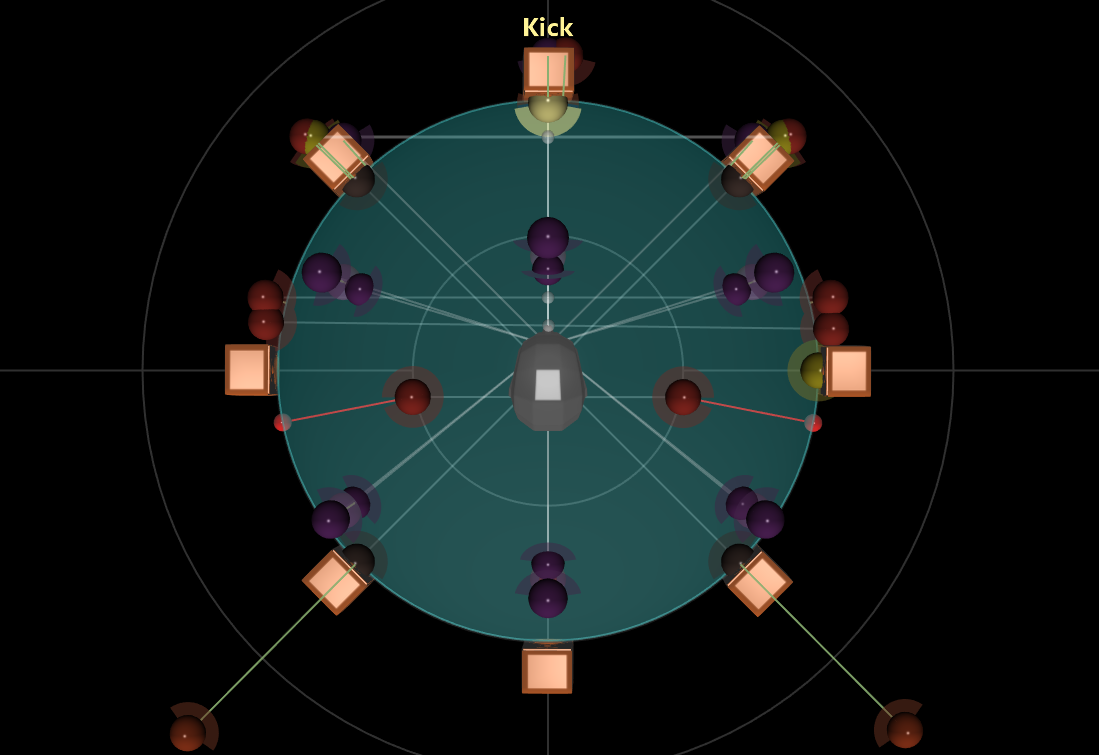
The efficiency zone
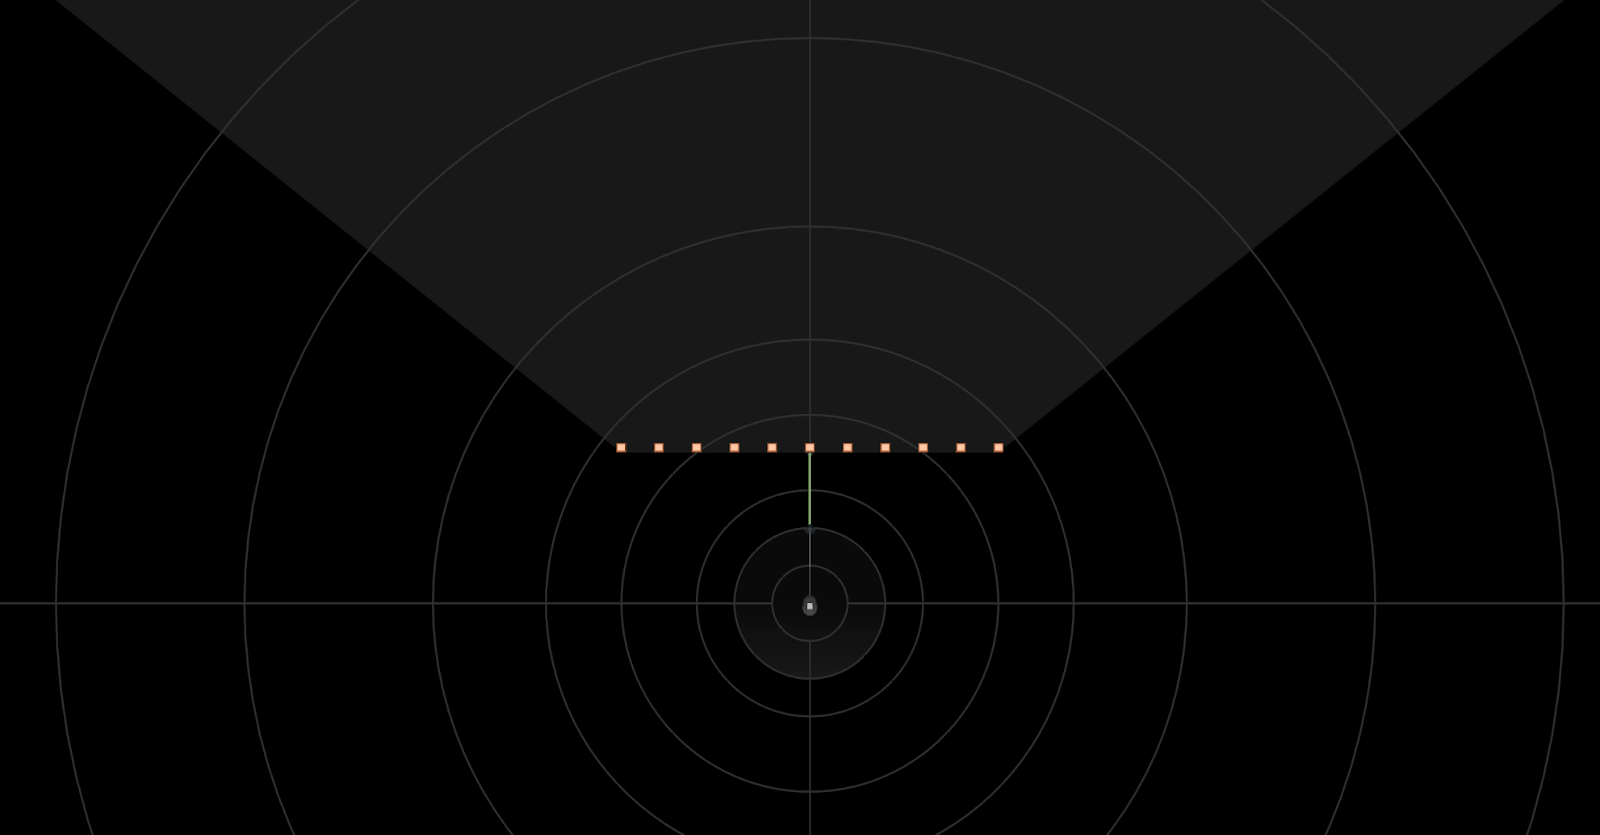
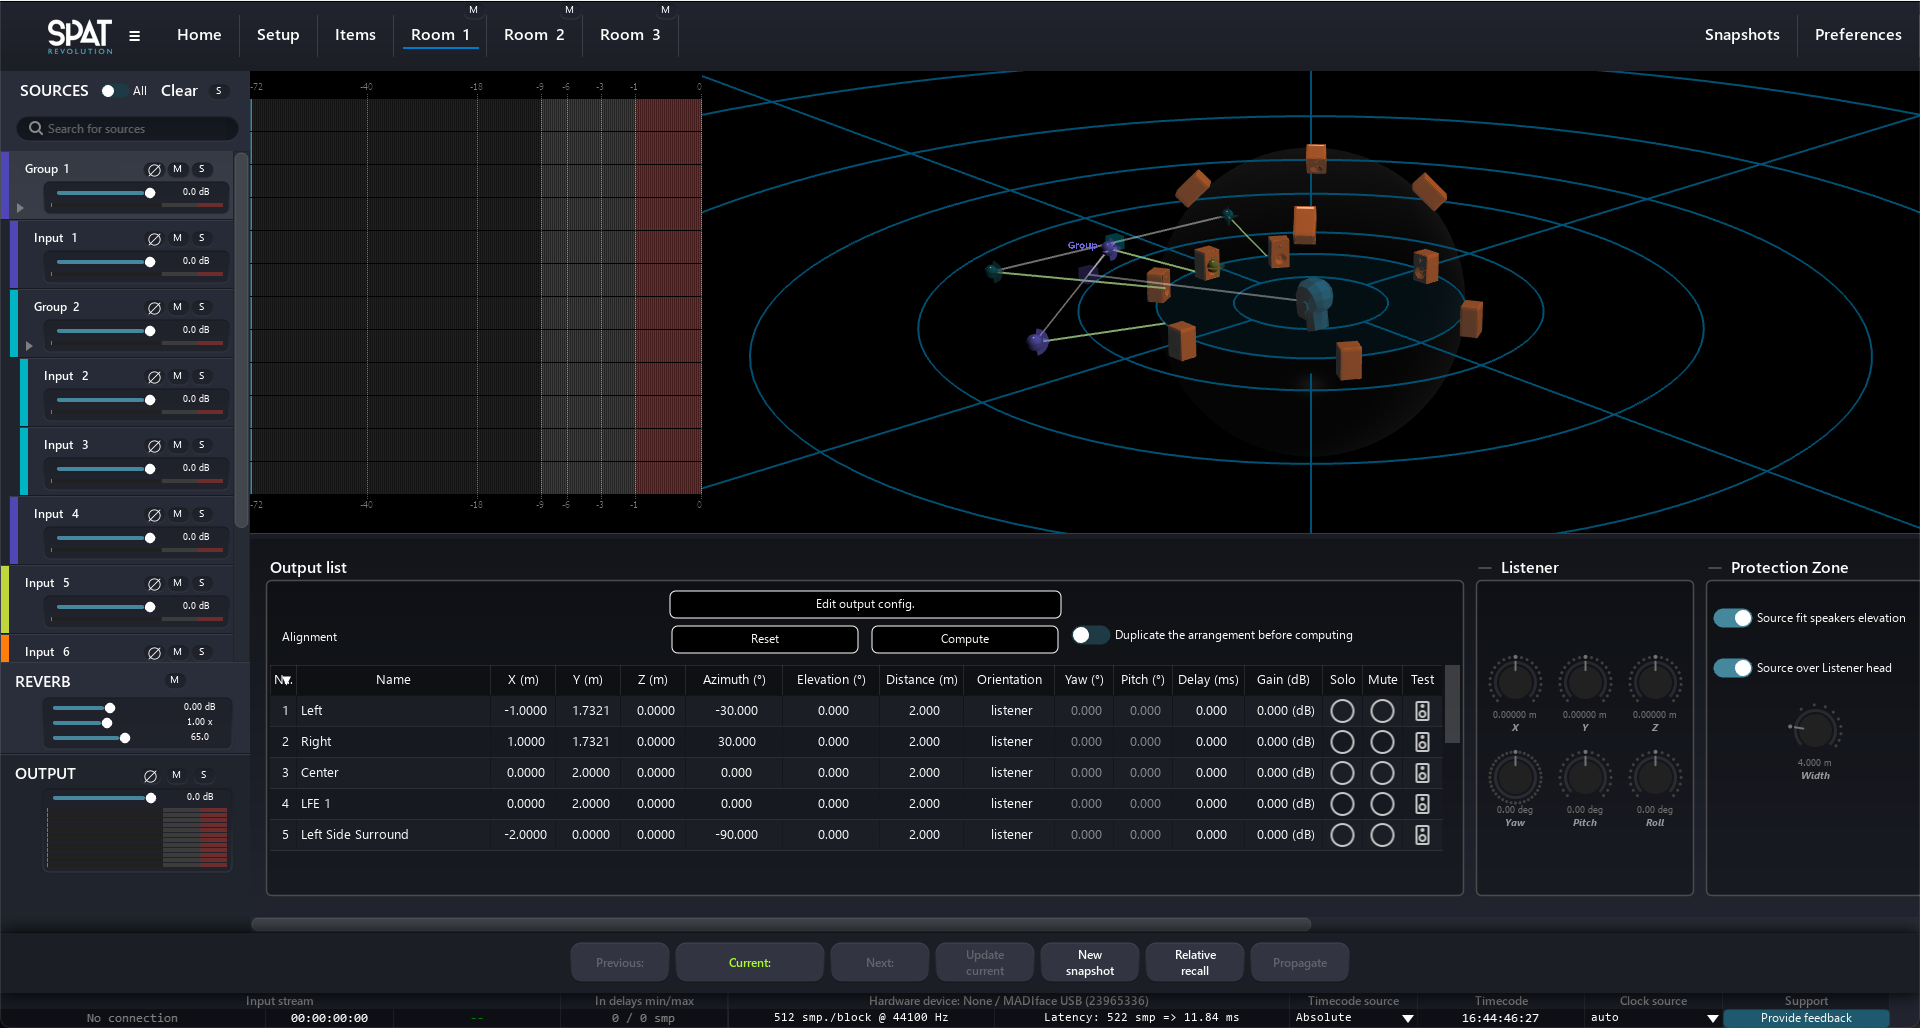
By definition, the efficiency zone is where the virtual sound sources should be localized. According to the speaker arrangement and coverage capacity, an efficiency zone is calculated for all channel-based panning types. It gets displayed on the 3D view as a grey shadow, and can be considered as a safe source position zone.
One of the advantages of this mechanism is that it allows to change a speaker arrangements while providing a tool to manage the sources already positioned in the soundscape that may be outside the zone.
Inside a channel-based room, the efficiency zone is defined by the speaker arrangement used in a room:
When using speaker setup that surrounds the listeners, the efficiency zone is a sphere (or circle in 2D), which spans from the border of the protection zone to the farthest distance you can put a source (100 m). A speaker array is considered surround if the angle between the foremost left and right speakers is over 180°. For readability reasons, the efficiency zone is not drawn in this case, but will be if its depth is define to a value inferior to its maximum (100 meters).
When using a non-surrounding system (stereo, frontal line, etc.), the efficiency zone becomes a “piece of pie” displayed in the 3D view. The angle between the foremost left and the foremost right speaker defines its width. Visualizing the efficiency zone should help understand these systems’ limitations in terms of spatialization options. For instance, placing a source behind the listener head in stereo will never produce the effect of a source coming from behind.
The “depth” parameter sets the range of the efficiency zone. It sets the maximum span. A use case for defining a maximum efficiency zone Depth in CLAMP mode is to limit the attenuation to the arc part of the zone.
Inside a non-channel-based room, the efficiency zone is a sphere because no speaker constrains the diffusion area. Still, it can be edited with the same “depth” parameters for multi-room and creative applications. More information below.
Behaviour of sources outside the efficiency zone
When a source is out of the efficiency zone, SPAT Revolution offers three behaviours:
- The source is clamped to the efficiency zone (default for new session)
- The source is muted
- It does nothing (default for pre 22.02 release sessions)
This option can be set in the room’s output section. Check out the Room section Room for more information.
By default, the source is clamped to the border of the efficiency zone.
Clamping the source to the efficiency zone helps to keep coherent sound scene, while the “mute” mode helps to create ins and outs effect. The mute only occurs in the actual room.
When in mute mode, a slight fade out is applied to avoid clicks. The fade’s length can be adjusted by making the source go faster or slower.
Note that the preferred behaviours are clamping or muting. Clamping will prevent an aberrant render in sound and localization.
The pictures below shown some key cases of clamping, on non-surround systems:
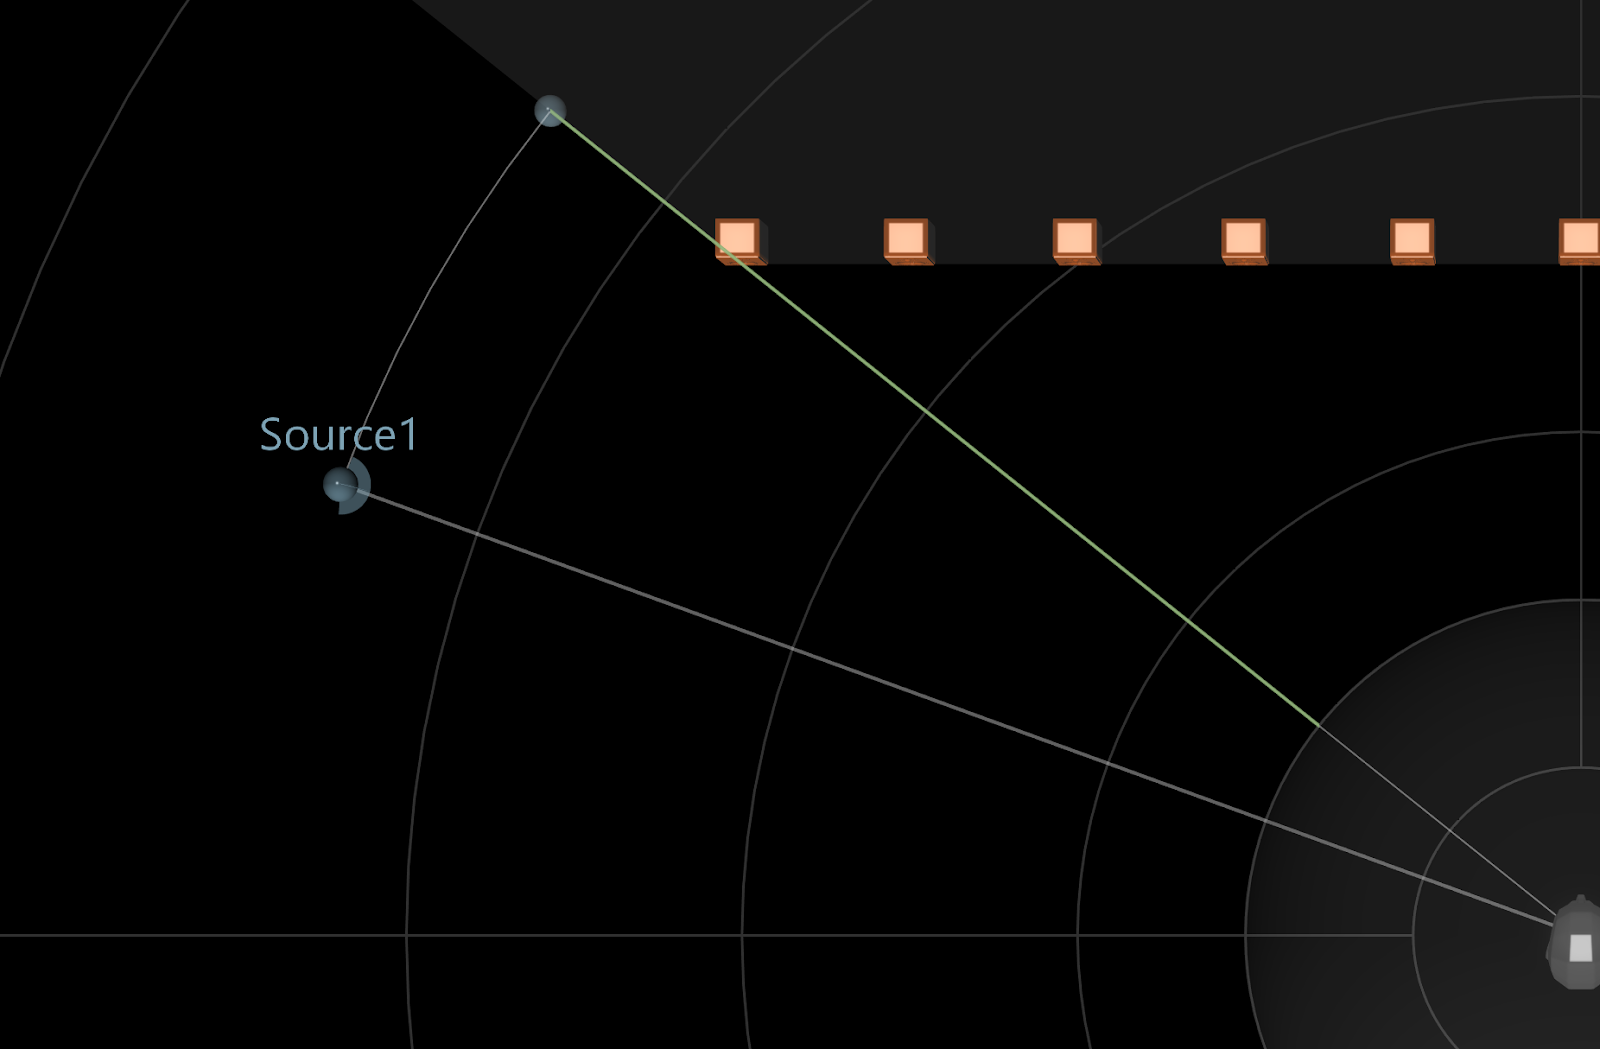
Trying to escape the efficiency zone on non-surrounding systems will result in the source being clamped to its foremost left or right.

If a source is placed in front of the speakers, it will be clamped to the front line they formed while preserving the azimuth angle.
When a source is on the opposite side of a non-surround system, the projection of the virtual source will mirror the behavior of the actual source, thus, removing any jump or abrupt change in position of the source.
When a source is outside the efficiency zone and mute behaviour is selected, the source is represented differently.
Elevation clamping
Elevation clamping helps keep sources within a coherent vertical range relative to your speaker arrangement. It only applies to channel-based configurations and can be activated with the Source fit speakers elevation parameter in the room options.
When enabled, sources that move above or below the vertical range of your speakers are automatically projected back onto the nearest speaker layer. A speaker layer is a group of speakers that share the same height — for example, in a 7.1.4 system, the ear-level speakers form one layer and the overhead speakers form another.
The clamping behavior differs depending on your speaker arrangement:
2D speaker arrays
With a 2D speaker array (all speakers at the same height), there is no benefit to placing sources above or below the horizontal plane. If you do — for example, when translating a 3D mix into a 2D room — SPAT Revolution creates phantom sources that represent the projection of each source onto the horizontal plane. The spatialization engine uses the phantom source position for rendering, but preserves the source’s actual presence factor so the perceived distance remains correct.
3D speaker arrays
Most 3D speaker arrays have at least two speaker layers. Elevation clamping handles sources as they go beyond the topmost or bottommost layer. Like with 2D arrays, this is shown with phantom sources that indicate the position actually used by the spatialization engine.
SPAT Revolution uses an adaptive clamping algorithm that preserves spatial continuity when a source is clamped:
Distance-preserving clamping — When a source is pushed onto a speaker layer, SPAT Revolution adapts the source’s azimuth to preserve its distance to the protection zone surface. This means the source’s apparent proximity (and therefore its spatial impression — presence, directness, etc.) remains consistent even though its elevation has changed. The source effectively “slides” around the protection zone to land on the correct speaker layer.
2D arrangement special case — For planar (2D) speaker arrangements with a flat protection zone (Height = 0), sources above or below the plane are first projected perpendicularly onto the speaker plane. If the projection lands inside the protection zone, the source is clamped to the zone surface directly, creating a smooth vertical-to-horizontal transition.
Limit cases
- Elevation clamping does not apply with distance-based panning algorithms (DBAP and WFS) when using 3D speaker arrays, except for the Z=0 plane. This prevents jumps and aberrations in the rendered sound.
- When using a 2D non-surrounding speaker array, efficiency clamping and elevation clamping are tied together. Activating efficiency clamping automatically enables elevation clamping. Conversely, turning off elevation clamping also disables efficiency clamping.
- WFS is the only case where it can make sense to put virtual sources in front of the speakers, to take advantage of the focus zone. This zone and the associated behavior is detailed in the WFS Section Room of this user guide.